

Table of Contents
- Introduction – Empowering Homeowners in Tulsa and Surrounding Areas
- Chapter 1: Troubleshooting Dead Outlets and Tripped Breakers
- Chapter 2: Why Lights Flicker and Outlets Spark
- Chapter 3: Recognizing Dangerous Electrical Problems
- Chapter 4: Safety Devices and Electrical Protection
- Q9. What are GFCI outlets and where should they be installed in my home?
- Q10. Should I have AFCI protection installed in bedrooms and living areas?
- Q11. How often should I test safety devices like GFCIs and AFCIs?
- Q12. What surge protection options are available for my home?
- Q13. How can I reduce the risk of electrical fires in my home?
- Chapter 5: DIY vs. Professional Electrical Work
- Chapter 6: Electrical Panel Upgrades and Home Wiring Safety
- Chapter 7: Choosing a Qualified Electrician (Credentials & Experience)
- Chapter 8: Estimates, Pricing, and Contracts
- Chapter 9: Permits and Code Compliance
- Chapter 10: Warranties, Follow-Up, and Safety Protocols
- Closing Summary – Keeping Your Home Safe and Powered in Tulsa
- References – Sources and Further Reading (APA format)
Introduction – Empowering Homeowners in Tulsa and Surrounding Areas
Hello, I’m Terry Davis, a Master Electrician and owner of TL Davis Electric & Design in Tulsa, OK. I’ve spent my career helping homeowners, landlords, and property managers across the greater Tulsa area – from Broken Arrow and Owasso to Sand Springs and Bixby – solve their electrical issues safely and efficiently. Over the years, I’ve heard many recurring questions from clients in communities like Claremore, Jenks, Sapulpa, and beyond. My goal with this guide is to empower you with knowledge so you can better understand your home’s electrical system, recognize when something is wrong, and make informed decisions about repairs or upgrades.
Electrical problems can be stressful and dangerous – but when you know the causes and solutions, you can address them promptly and prevent hazards. In the chapters that follow, I’ll cover the most common residential electrical questions in a clear Q&A format. You’ll learn why outlets stop working, why breakers trip or lights flicker, what causes outlets to spark, and the warning signs of serious issues. I’ll also discuss modern safety devices like GFCI and AFCI breakers (and why they’re required by code in certain areas), as well as surge protectors and other ways to safeguard your home’s electronics. Additionally, I’ll guide you through when it’s okay to DIY an electrical task versus when to hire a licensed electrician, and I’ll answer your concerns about finding the right electrician – covering everything from credentials and experience to pricing, permits, warranties, and safety practices.
Whether you own a historic bungalow in Tulsa’s midtown, a newer home in Owasso, or a rental property out in Verdigris or Mannford, this guide will help you handle electrical issues with confidence. Let’s dive into the first set of questions, which cover troubleshooting common electrical problems like dead outlets and tripped breakers.
Chapter 1: Troubleshooting Dead Outlets and Tripped Breakers
Q1. Why isn’t this electrical outlet working, and what could be causing it?
If an outlet in your home suddenly stops working, there are a few common causes to investigate. Often, the issue is not the outlet itself but something upstream in the circuit. Here’s what I recommend checking first:
- Tripped Circuit Breaker or GFCI: A tripped breaker is the most frequent cause of a dead outlet. Go to your electrical panel and see if any breaker has flipped to the OFF (or middle) position. Sometimes breakers don’t look tripped, so firmly switch the suspect breaker off then on to reset it. Also, if the outlet is in a kitchen, bathroom, garage, or outdoor area, it might be protected by a GFCI outlet on the same circuit. Look for any GFCI outlets (the ones with “Test” and “Reset” buttons) that have tripped. Press the Reset button on the GFCI and see if power returns. A tripped Ground Fault Circuit Interrupter will cut power to all outlets downstream on its circuit for safety.
- Burned-Out or Worn Outlet: Outlets can wear out or fail over time. The internal contacts might become loose or corroded. If you plug in a device and it feels loose or the plug falls out easily, that receptacle is likely worn out. Outlets can also burn out due to arcing or overload; signs include scorch marks, melting, or a burnt smell at the outlet. In such cases, the outlet should be replaced. Do not use an outlet that is visibly damaged or burnt – it’s a fire hazard.
- Tripped GFCI in Another Room: Sometimes one GFCI outlet controls multiple locations. For example, a GFCI in a bathroom or garage might also protect an exterior outlet or an outlet in another bathroom. If your exterior or bathroom outlet is dead, check all GFCIs in the house (press reset). A single tripped GFCI can cause several downstream outlets to lose power.
- Loose Wiring or Connection: Another cause could be a loose wire connection at the outlet or in a junction box. Outlets are often daisy-chained (wired in series), so a loose neutral wire at one outlet can kill power to outlets further along the circuit. If you’re comfortable and the power is off, you might remove the outlet cover and gently check if wires are securely attached. However, be cautious – if you suspect wiring issues, it’s safest to call an electrician. We have tools to trace circuit continuity and find where a connection has opened.
In summary, start with the simple fixes: check the breaker panel for trips, and reset any GFCI outlets. If that doesn’t work and multiple outlets or lights are out, it could be a wiring issue or a failed outlet. At that point, call a licensed electrician. We have specialized testers to determine whether an outlet is receiving power and where the interruption occurs. Don’t ignore a dead outlet, especially if resetting breakers/GFCIs didn’t help – it could indicate a loose connection or other problem that needs professional repair to prevent electrical hazards.
Q2. What should I do if a circuit breaker trips repeatedly?
A circuit breaker that keeps tripping is a sign that something is wrong – it’s essentially your electrical system’s way of saying “Too much! I can’t handle this load or fault.” Breakers trip to protect your home from overheating wires and potential fires, so never ignore a persistent trip or keep resetting the breaker without addressing the cause. Here’s how to troubleshoot and handle this situation:
- Identify the Circuit: First, figure out which circuit is tripping. Check your electrical panel – breakers should be labeled (e.g., “Kitchen outlets” or “Bedroom circuit 2”). The breaker that’s flipped off is the one to focus on. Note what rooms or outlets lost power – that’s your circuit.
- Unplug Everything on that Circuit: A very common reason for tripping is circuit overload – too many devices drawing power on the same circuit. Unplug or switch off all appliances and lamps on that circuit. Reset the breaker by flipping it fully off and back on (you might feel it click). If it stays on, plug things back in one at a time. You may discover, for example, that running the toaster and microwave together trips the kitchen breaker – meaning those two appliances combined overload that circuit. In that case, try to avoid using them simultaneously, or have an electrician wire a new circuit to split the load. According to electrical code calculations, circuits have limits on safe load, so consistent tripping means you’re exceeding that limit.
- Check for Short Circuits or Ground Faults: If the breaker trips again even with nothing plugged in, or as soon as you reset it, you likely have a short circuit or ground fault. A short circuit occurs when a hot wire touches a neutral or ground, causing a surge of current that immediately trips the breaker. This could be due to a wiring issue, like damaged insulation or a loose connection touching metal. Signs of a short include a loud pop or spark when it trips, or burn marks on an outlet. A ground fault (often handled by GFCI breakers) is when a hot wire contacts a grounded surface or wire, often due to moisture or wiring damage. If you suspect a short or ground fault, do not keep resetting the breaker – it’s telling you there is a potentially dangerous wiring problem. Call an electrician to find and fix the fault. We might inspect outlets, switches, and fixtures on that circuit for signs of burning or loose wires.
- Consider a Faulty Appliance: Sometimes an appliance is the culprit. A bad motor in a vacuum, an aging space heater, or even a faulty surge protector can trip the breaker repeatedly. To test this, use a process of elimination: plug in one device at a time on that circuit and see when the breaker trips. If, say, the breaker only trips when the microwave is on – that appliance may have an internal issue drawing too much current. Stop using any device that trips the breaker and have it repaired or replaced.
- Is the Breaker Itself Bad?: Occasionally, breakers do wear out or fail over many years. If a breaker trips with no load, or it feels loose or won’t reset properly, the breaker mechanism might be bad. Also, if the breaker has been tripped hundreds of times over decades, it may not hold reliably. In such cases, an electrician can swap it out for a new breaker of the correct amperage. Do not replace a breaker with a higher-amp one just to stop it tripping – that could allow wires to carry more current than they’re rated for, creating a fire hazard. Always use the correct breaker size as per the circuit’s wire gauge.
In short, a repeatedly tripping breaker is a protective feature that tells you there’s either too much demand on that circuit or a problem that needs fixing. Your job as a homeowner is to unplug devices and avoid overloading that circuit. If that doesn’t solve it, call in a professional. I’d rather come out and find a loose connection or replace a faulty breaker than have you risk an electrical fire by continually resetting a tripping breaker. Remember, breakers trip to keep you safe – find and fix the cause rather than ignoring the warning.
Chapter 2: Why Lights Flicker and Outlets Spark
Q3. What does it mean if my lights flicker or dim unexpectedly?
Flickering or dimming lights can be annoying, but they’re also a significant warning sign. In many cases, flickering indicates a minor issue like a loose bulb. In other cases, it can point to a more serious electrical problem such as a loose connection or overloaded circuit. Here are the common causes and what they mean:
- Loose or Improper Bulb: Always start with the simple fix – is the bulb screwed in tightly? A loose light bulb can flicker because it isn’t making constant electrical contact. Turn the light off, let it cool, and gently tighten the bulb. Also, if you recently switched to LED or CFL bulbs on a dimmer switch, note that incompatible bulbs and dimmers can cause flickering. Ensure your dimmer is rated for LED if you use LED bulbs – otherwise, you might get that annoying intermittent flicker or buzzing.
- High-Demand Appliances Causing Dimming: Do the lights dim only when a large appliance kicks on (like your air conditioner, well pump, or vacuum cleaner)? A big motor can draw a surge of current when it starts, causing a voltage drop in your home’s system. A slight, momentary dimming (often termed a “brown-out” flicker) when the A/C starts is not uncommon and can happen if the appliance is on the same circuit or panel bus as your lights. However, if it’s very noticeable or prolonged, it could indicate the circuit is near capacity or the appliance is drawing more current than it should. In that case, an electrician can look at redistributing loads or checking the appliance.
- Loose Wiring or Connections: Frequent or random flickering throughout a room or house (not tied to a single lamp or appliance turning on) often points to a loose wire or connection in the electrical system. This is potentially dangerous. It could be a loose neutral at the panel or in a junction box. When connections are loose, the flow of electricity is interrupted briefly – causing lights to flicker. If all the lights in the house flicker together, it might even be an issue with the utility service (like a loose neutral from the power company or grid fluctuations). If you notice widespread flickering, call an electrician to investigate. We may need to tighten neutrals in your panel or check the service lugs. In some cases, we’ll coordinate with the utility company if the problem is on the supply side (for example, a loose neutral in the meter can cause lights to flicker or even get brighter/dimmer unpredictably – a serious condition).
- Faulty Light Switch or Fixture: Sometimes the issue is localized to one fixture or room. A worn-out light switch can cause flickering by not maintaining a solid contact – you might even hear a crackle when you jiggle the switch. Similarly, an older fluorescent fixture with a failing ballast will flicker. LED lights can flicker if their driver (internal power supply) is failing. If one fixture flickers no matter what bulb you put in, the wiring to it or the fixture itself may be faulty. Don’t ignore this; flickering can be a precursor to the light going out entirely or an electrical failure. Replacing a light switch or fixture is relatively quick for a professional.
- Flickering with Buzzing or Burning Smell – Serious Issue: If the flicker is accompanied by a buzzing sound, popping noises, or any burnt odor, shut off that circuit and call an electrician. Those are signs of arcing or a loose connection heating up. For example, a bad connection in a ceiling light box can cause both flicker and a sizzle/buzz as the current arcs across a gap. This is a fire hazard – it needs prompt attention.
Overall, an occasional minor flicker might not be an emergency, but repeated or widespread flickering is not normal. In my experience serving homes around Tulsa, I’ve traced flickering lights to everything from a simple loose bulb to deteriorated aluminum wiring connections in a 1960s house. The key is: don’t ignore frequent flickering. It’s one of the common signs of electrical issues that should be checked. A licensed electrician will systematically troubleshoot: we’ll check the affected circuits for loose neutrals, measure voltage drop under load, and tighten any suspect connections. This not only stops the flicker but also prevents potential fires or loss of power.
Q4. Why does an outlet spark when I plug something in?
Seeing a spark jump when you plug an appliance into an outlet can definitely be startling. Sometimes a tiny blue spark is normal – this is called a “load arc” and happens when a plug’s prongs initially make contact, especially if the device was already switched on (you might notice a quick spark when plugging in a phone charger or lamp). However, if an outlet frequently produces a large spark, a loud pop, or any sustained arcing, that indicates a problem that needs fixing. Here’s what you need to know:
- Normal vs. Abnormal Sparks: A normal spark is small, brief, and happens right as the plug connects – it’s due to the sudden draw of current. For instance, plugging in a vacuum cleaner that’s already turned on can cause a quick blue snap inside the outlet – the internal contacts are closing the circuit. This should be very momentary. An abnormal spark is large, bright, or accompanied by a crackling sound or burning smell. If you see yellow or white sparks, or sparks that dance or persist longer than an instant, stop using that outlet.
- Causes of Outlet Sparks: Sparking outlets are often caused by loose connections or damaged components. Inside each outlet (receptacle), wires attach to screws or push-in connectors. If those connections loosen over time, or if the metal contacts that grip the plug become worn out, an electrical arc can form. This is essentially electricity jumping through air – the same phenomenon as lightning on a small scale. Damaged or frayed wiring in the wall or outlet can also cause arcing. Another cause is short circuits: if the hot wire touches the neutral or ground due to insulation failure, it can create a spark or even trip the breaker immediately. Overloading an outlet (e.g., using a cheap adapter to plug in six things) can also lead to heat, melting, or sparks.
- Dangers of Sparking: An occasional small spark might not do harm, but frequent or intense sparks can start a fire. The heat from an arc can char the outlet and wiring. You might notice the outlet cover is discolored or melted – that’s a red flag. In fact, sparks or electrical arcs are a clear sign of trouble and should be addressed promptly by a professional. One study by the U.S. Fire Administration found that many home electrical fires start at outlets due to arcing faults. This is exactly why modern code now requires Arc-Fault Circuit Interrupters (AFCIs) in many areas of the home (more on that in Q10).
- What to Do if an Outlet Sparks: Unplug anything from that outlet and stop using it until it’s inspected. If you notice char marks or if it sparked and the breaker tripped, leave the breaker off for that circuit and call an electrician. If it’s just a minor spark but happens often, that outlet likely needs to be replaced. I often find outlets in older homes around Tulsa that have gotten loose internally; replacing the receptacle is an easy fix that can stop the sparking. Also, never ignore a sparking outlet that also feels hot or has a burning smell – that could indicate an active fault and imminent fire risk.
- Prevention: To prevent outlet problems, avoid overloading outlets with too many appliances. Use power strips or have additional outlets installed if needed rather than daisy-chaining adapters. Also, insert plugs firmly and fully – a half-plugged device can definitely spark and arc. If a plug is loose and falls out easily, that outlet is worn and should be replaced. When unplugging devices, try to switch them off first (so there’s no live current draw during unplugging, reducing arcing).
In summary, occasional tiny sparks when plugging in can be normal, but consistent or large sparks are not. They signal worn-out or faulty outlet connections or wiring. As a master electrician, I treat sparking outlets seriously – I’ll check the wiring, tighten connections or replace the outlet, and ensure no further damage has been done. It’s a quick repair that can prevent electrical fires and give you peace of mind. Don’t brush off sparking – get it fixed.
Chapter 3: Recognizing Dangerous Electrical Problems
Q5. What are the warning signs of a serious electrical problem that needs a professional?
Electrical issues often give early warning signs before they lead to bigger hazards like fires or shocks. As a homeowner, you should be vigilant for any unusual behavior in your electrical system. If you notice any of the following warning signs, you likely have a serious problem that merits calling a licensed electrician right away:
- Frequently Tripping Breakers or Blown Fuses: An occasional trip might just mean an overloaded circuit (see Q2), but if breakers are tripping repeatedly (or fuses blowing often in an older panel), that’s a sign of a persistent problem. It could be an overloaded circuit, a short circuit, or a failing breaker. Frequent trips mean your system is under stress and needs attention.
- Flickering or Dimming Lights: As discussed in Q3, lights that flicker or dim on their own – especially across multiple rooms – are a warning sign. They could indicate loose wiring connections, an overloaded circuit, or issues with the neutral. This isn’t just an annoyance; it can precede outages or arcing. Consistent flickering should be checked out, as it’s one of the signs you may need electrical repair.
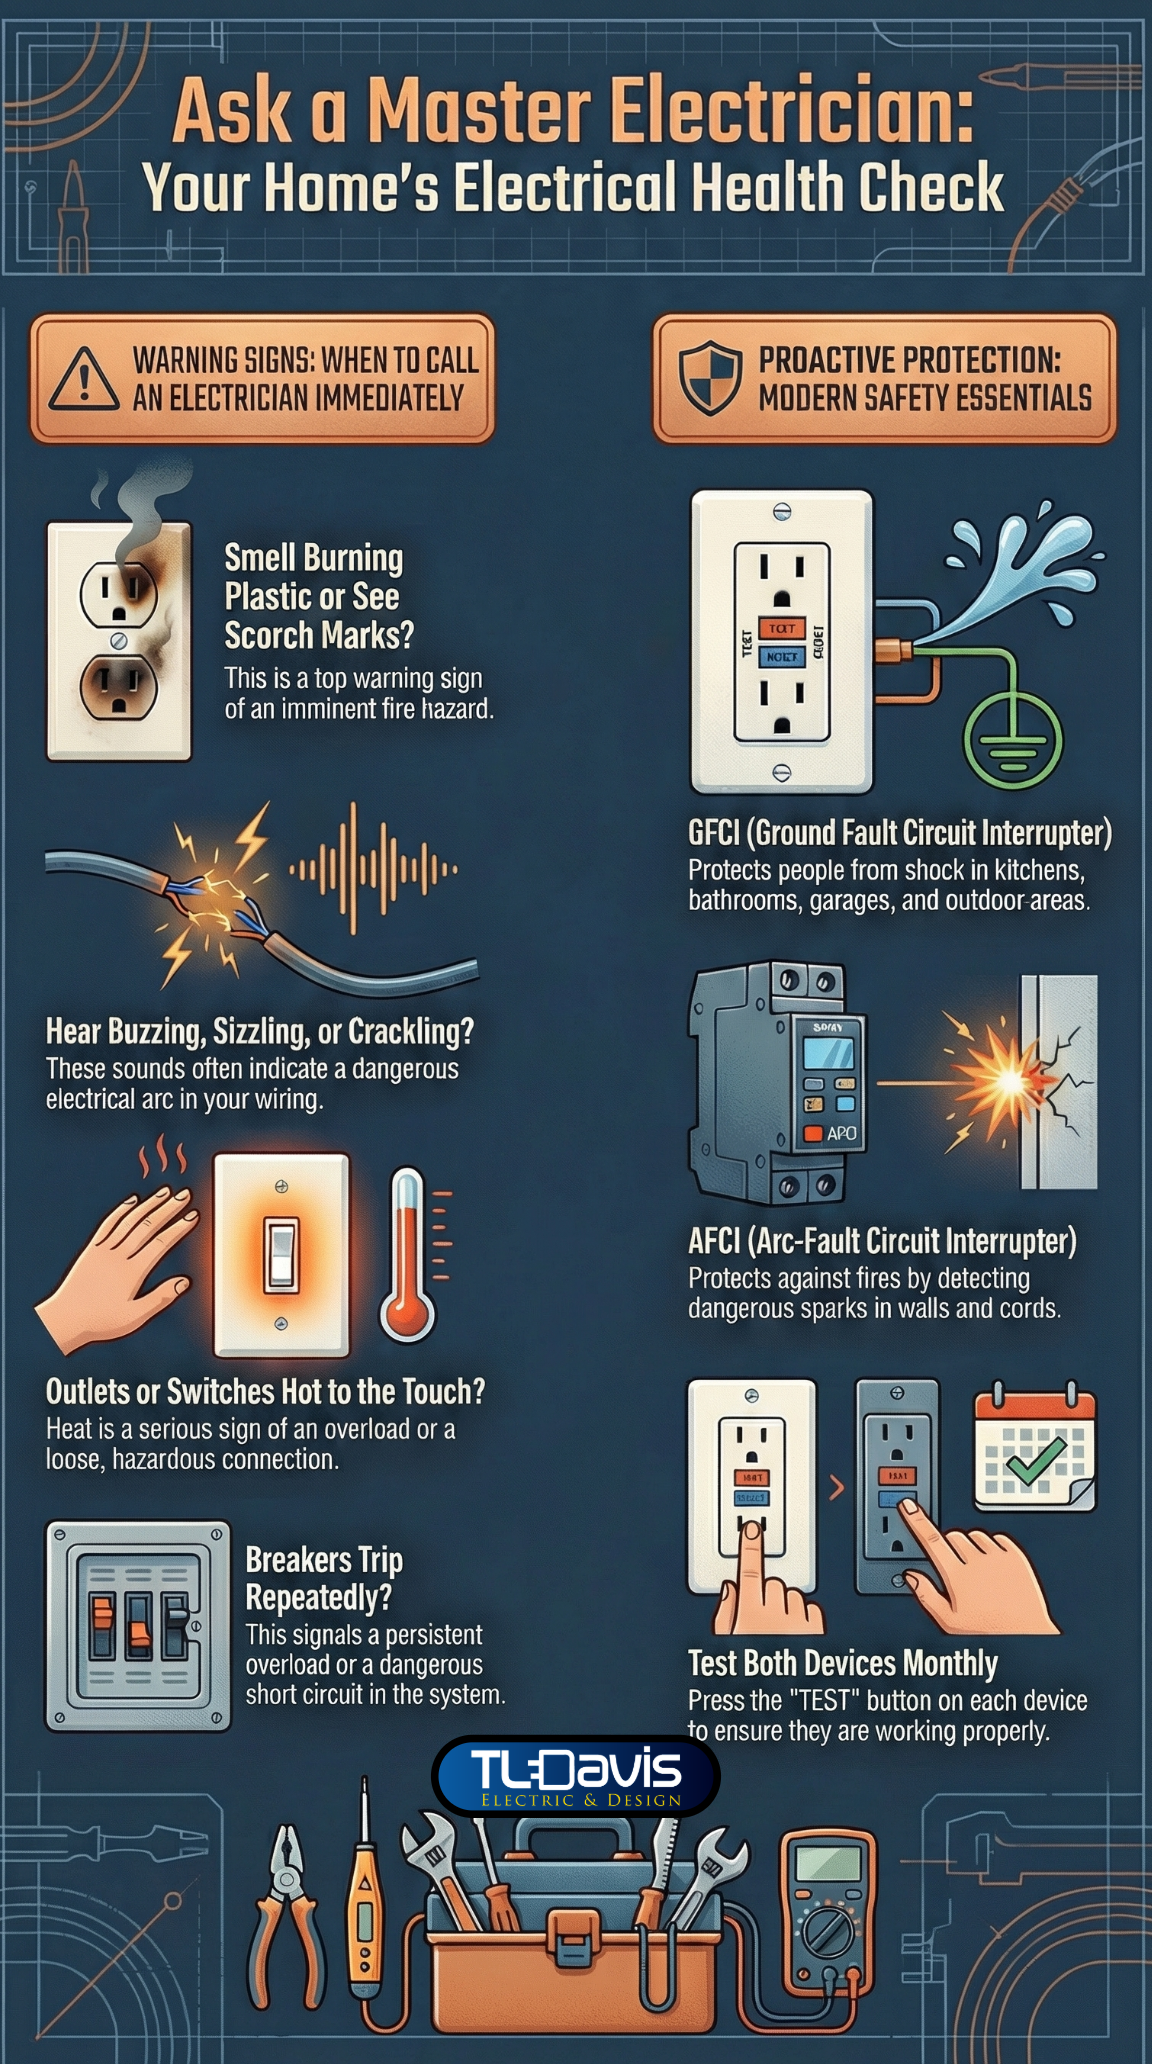
- Burning Smell or Scorch Marks: If you smell something burning, melting, or an acrid electrical odor, take it very seriously. An unexplained burning plastic smell could be due to overheated wiring insulation. Immediately turn off power to that area (flip the breaker) and investigate. Outlets or switches with scorch marks, blackening, or melted plastic on them, or on the wall plate, are a glaring red flag – this usually indicates arcing or a small electrical fire internally. Do not use the affected device and call an electrician ASAP. I’d much rather come out at 9pm for a burning smell than have you wait and risk a fire overnight. A burning smell from outlets or panels is a top warning sign of imminent danger.
- Buzzing, Sizzling, or Crackling Sounds: You should not hear your electrical system. So if you notice a buzzing sound coming from outlets, switches, or the breaker panel, that’s a sign of an electrical arc or loose connection. Electricity itself is silent; any noise means something is not tight or is failing. A buzz at a light fixture could mean a loose bulb or wiring issue. A sizzle or crackle sound (like bacon frying) is often a sign of arcing – possibly a wire barely touching a connection and sparking. Buzzing breakers could indicate a bad breaker or an overloaded circuit. In any case, turn off the power to that circuit and have it checked. These noises are serious warnings that shouldn’t be ignored.
- Warm or Hot Outlets/Switches: None of your outlets or light switches should ever feel hot to the touch. It’s normal for dimmer switches (which dissipate some heat) to be slightly warm, but not hot. A warm outlet often indicates overloading or a loose connection, causing heat buildup. For example, if an outlet is warm and has a large TV or space heater plugged in, that device might draw more current than the outlet is rated for (15 amps is typical). Or the outlet wiring could be loose, causing resistance heating. Likewise, a hot switch could indicate internal failure. Heat is a byproduct of electrical resistance – something is not right. If you feel any warmth, stop using it and call a professional. I’ve traced warm outlets in clients’ homes to things like backstabbed (push-in) connections that had loosened and were arcing behind the outlet. Caught early, we can fix it by re-terminating the wires. Ignored, it could start a fire in the wall. Never cover up the problem (like don’t put a couch in front of a warm outlet or ignore a hot switch) – get it fixed.
- Sparks or Arcing: We covered sparking outlets in Q4. But generally, seeing sparks from any electrical component (outlet, switch, breaker panel) is a big flashing sign of trouble. Also, if you see visible arcing or sparking inside a breaker panel or fuse box, or you hear a loud zap, that’s an emergency – cut the main power and call an electrician immediately. Arcing in panels can indicate a loose service connection or a breaker failing. Don’t open the panel cover if you suspect arcing inside; let us handle that with proper safety gear.
- Shock or Tingle on Touch: If you or family members have gotten a shock from an appliance, outlet, or switch, even a mild one, that indicates a fault. It could be a grounding issue or a wiring error. For instance, if an outlet is wired incorrectly with hot/neutral reversed or not grounded, touching a metal appliance could shock you. Or a fault in an appliance (like a fridge or washer) might be energizing its chassis due to lack of proper grounding. Any shock is cause for concern – electricity should stay confined in the wires and devices, never through your body! Stop using the affected equipment and have it checked. Sometimes the fix is adding GFCI protection to that circuit, or correcting a wiring mistake, but it’s critical for safety.
- Persistent Circuit Problems: Overall, if you have recurring issues with a particular circuit or area – like one room where bulbs burn out way too often, or an outlet that always trips a breaker when the vacuum is used – don’t just live with it. These patterns often point to an underlying problem (like too much load, bad wiring, etc.) that can be resolved. “Normal” electrical systems don’t behave erratically.
In short, know these warning signs and never ignore them. I tell my Tulsa customers this all the time: your home will “tell” you when it has an electrical hazard – you’ll see, hear, or smell something. When you do, listen to those warnings. In my experience, homeowners who act on early signs (calling me when they smell burning plastic, or when a breaker trips repeatedly) avoid the truly scary outcomes like house fires or full power loss. So if you notice any of the signs above – frequent trips, flickering, burning smells, buzzing, hot outlets, sparks, shocks – turn off the power and call a licensed electrician without delay. It’s always better to be safe and let a professional pinpoint and fix the issue.
Q6. How can I tell if a receptacle or switch is faulty?
Sometimes an outlet (“receptacle”) or wall switch simply goes bad with age or wear. A faulty device can be a fire or shock hazard, so it’s important to recognize when one needs replacement. Here are some clues that an outlet or switch is faulty:
- Physical Damage or Wear: Inspect the device. Is the outlet cracked, broken, or discolored? Cracks can expose internal metal contacts. Discoloration (yellowing or burn marks) could mean overheating. If you see soot or burn marks on an outlet or switch plate, that’s a clear sign it failed and shorted or arced at some point. Such devices should be replaced immediately. Similarly, if a switch toggle is loose or wobbly, or an outlet’s slots are loose (won’t grip plugs tightly), the mechanical parts have worn out. Outlets are supposed to firmly grip plugs; if a plug falls out or is very easy to insert/remove, the spring tension is gone – that outlet is at end-of-life.
- Function Issues: Obviously, if an outlet doesn’t deliver power to multiple devices (and you’ve ruled out the breaker being tripped or the device being bad), the outlet may have an internal break. Sometimes one half of a duplex outlet works and the other doesn’t – that could mean a bad internal connection (or that the outlet was “half switched” and wired oddly, but often it’s a broken contact). With switches, if you flip it and the light flickers or doesn’t always respond, the switch contacts could be failing. A common sign is if you have to wiggle or fiddle with a switch to get a light to stay on – that’s a bad switch. Likewise, if an outlet only works intermittently (plug in a lamp and it flickers when you jiggle the plug), it’s likely faulty or has loose wire connections.
- Heat, Noise, or Odor: A faulty outlet or switch might feel warm, as mentioned in Q5, due to internal resistance. It might also produce a faint buzz or crackle sound when load is on it (for example, you might hear a sizzle in a light switch when the light is on – not good!). If you smell any burning plastic or ozone from a device, it’s bad. You should not smell or hear your outlets and switches. These symptoms indicate arcing inside the device, likely due to a worn-out or loose internal contact. For instance, I’ve opened up flickering light switches and found the contacts charred from years of arcing. The fix: replace the switch.
- Loose Fit or Movement: If the whole outlet or switch is loose in the wall (moving or wiggling when you plug something or toggle it), that’s not necessarily the outlet’s fault (it might be a loose mounting screw or shallow box), but it can lead to faulty operation because the wires can loosen or stress. It should be fixed (by tightening mounting screws or adding spacers). But if the electrical receptacle itself is loose (as in it no longer holds a plug snugly), as mentioned, the internal metal contacts have lost tension. This happens often in older outlets that saw heavy use (like where people plug in a vacuum daily for 20 years). Loose contacts lead to arcing and heat. The outlet needs replacement.
- Tester Indications: You can buy a simple outlet tester (the kind with lights) for a few dollars. When you plug it in, the pattern of lights will tell if the outlet is wired correctly (correct, or hot/neutral reversed, open ground, etc.). If you ever test an outlet and get a weird reading (like “open neutral” or “hot/ground reversed”), that outlet or its wiring is faulty and needs attention. Sometimes a single bad outlet can cause an open-neutral condition downstream. An electrician’s multimeter can further diagnose it, but the tester gives a quick indication. Also, a GFCI outlet that won’t reset or test properly is faulty (or improperly wired) and should be replaced.
In practical terms, most faulty outlets and switches will either show visible signs (burn marks, cracks), feel loose, or operate inconsistently. For safety, turn off power to any suspect outlet or switch before touching it or attempting to replace it. If you’re not entirely comfortable doing the replacement, call a professional. It’s a quick job for an electrician to swap in a new outlet or switch, and the peace of mind is worth it. In my service calls, I often end up replacing a handful of worn-out outlets for homeowners – especially in houses 20+ years old that have never had them updated. The new devices are inexpensive and meet modern safety standards (today’s outlets must be tamper-resistant, for example, which helps protect kids).
One more tip: listen to your gut – if an outlet or switch just doesn’t seem right (doesn’t work reliably, looks charred, makes noises, etc.), it’s likely faulty. Turn off the power and have it checked/replaced. It’s an easy fix that can remove a potential fire hazard.
Q7. What causes buzzing or crackling sounds from electrical fixtures?
If you hear buzzing, humming, or crackling coming from an electrical fixture, outlet, or the breaker panel, it’s a sign that electricity is not flowing smoothly. Normally, electrical current is silent; noise means there’s vibration or arcing occurring. Here are common causes and what they mean:
- Loose Connections: A loose wire connection is the most common cause of crackling or sizzling sounds. For example, a loose screw terminal on a switch or outlet can cause current to arc across the small gap, making a fizzing or crackling noise. Similarly, a loose connection in a light fixture (say, a wire nut that isn’t tight) can buzz under load. These sounds often indicate arcing, which is electricity jumping through air at the loose joint. Not only does it make noise, but it’s generating heat and carbonizing the connection. Left alone, it can start a fire. This is why you should never ignore a crackling sound. I’ve had clients call saying, “I hear crackling behind a switch when I turn it on,” and indeed found a loose wire arcing every time the circuit drew current. We immediately shut off the power, repaired the connection, and the noise and hazard were gone.
- Overloaded or Failing Switches: Standard light switches or dimmers can buzz if they are handling more load than they’re rated for. Dimmer switches often emit a slight hum at certain levels – this is somewhat normal due to their internal electronics chopping the voltage. However, a loud buzz is not usual. Using an LED bulb with an old dimmer can cause buzzing (the solution is an LED-compatible dimmer). If a regular (non-dimming) switch buzzes, it could be failing – the contacts might be arcing. Replacement is the fix.
- Fluorescent Lights and HID Lights: It’s worth noting that some light fixtures inherently hum or buzz – especially older fluorescent tube lights with magnetic ballasts. Those ballasts hum when aging. Likewise, certain high-intensity discharge (HID) lamps (mercury vapor, etc.) have ballast hum. If you have a fluorescent light buzzing, replacing the ballast or the whole fixture (new electronic ballasts are silent) will solve it. So, determine if the noise is from the fixture type (fluorescent buzz) or from a wiring issue (which is more of a crackle or irregular buzz).
- Outlet or Panel Buzzing: An outlet that’s buzzing usually means a loose connection or damaged outlet as mentioned. However, sometimes you might hear a buzz from a wall outlet when a heavy load is plugged in – that can indicate the outlet is worn and the plug is arcing slightly. Unplug any appliance making an outlet buzz and don’t use it until it’s fixed. In the electrical panel, a buzzing sound could be a bad breaker or a loose wiring termination on the breaker. If a breaker is not fully seated or its connection to the bus bar is poor, it can sizzle under load. Also, an overloaded breaker might buzz before tripping. A failing main breaker or service connection can make a hum/buzz too – which is more dangerous. If you hear noises from your breaker box, call an electrician right away. We may need to tighten connections (with the power safely off) or replace a faulty breaker.
- Electrical Hum from Transformers: If the buzzing is more of a steady hum, it could be a transformer (for example, those little plug-in power adapters for electronics can hum, or a doorbell transformer in your utility closet might hum). That’s usually not dangerous, just an AC hum from the magnetic fields. But a new, louder-than-normal hum from a device could indicate a fault.
To sum up, buzzing or crackling sounds are typically caused by electrical vibrations or arcs from loose or failing components. This is not normal and needs attention. The only slight exception is a low hum from certain lights or dimmers, but even that can often be eliminated with newer tech. As a rule of thumb: crackling = bad (likely arcing), loud buzzing = bad (loose connections or overload), soft hum = monitor it (maybe normal for a dimmer or fluorescent, but should not be present in outlets or panels). If you’re unsure, err on the side of safety – kill the power and call a professional. When I troubleshoot buzzing sounds, I methodically check all connections on that circuit. In many cases, simply tightening a neutral wire in the panel or replacing a worn outlet has silenced the noise and removed a lurking fire hazard.
Remember, electricity is quiet when everything is healthy. Unusual sounds signal trouble – don’t ignore them.
Q8. Why is a switch or outlet warm or hot to the touch?
A warm or hot switch/outlet is a cause for immediate concern. Electrical devices should not typically run hot – if they do, it means electrical energy is being lost as heat, usually due to high resistance or overload. Here’s what might be happening and what to do:
- Overloaded Circuit or Device: If an outlet is hot, it could be that you have too many things plugged into it (or into the same duplex). For instance, if you have a space heater and a hairdryer plugged into the same outlet via an adapter, that’s likely overloading it. The outlet connections and internal metal may heat up from carrying current beyond their safe capacity (most outlets are rated 15 amps). The heat is a warning. Unplug some devices and redistribute them to different circuits. However, even a properly loaded outlet should not be hot; if it’s truly hot to touch, I would suspect damage. A warm dimmer switch is somewhat normal as mentioned (dissipating a few watts of heat), but a standard light switch that is hot is not normal. It might be carrying too much load (e.g., controlling too many lights or a big fixture beyond its rating) or it’s failing.
- Loose or Corroded Connections: A loose wire on the screw of a switch/outlet or a loose backstab connection (where the wire is pushed into the back) creates a high-resistance point that generates heat when current flows. This can make the device warm or even hot and is very dangerous – it can start a fire inside the wall. In fact, warm outlets or switches are often a sign of overloaded or loose wiring that can lead to electrical fires. Many times, when I open up a warm outlet, I find the backwire connection has been arcing. The plastic around the connection might be discolored from heat. The remedy is to shut off the power, and either re-terminate the wiring properly (preferably on the side screws or using a pigtail) or replace the outlet if it’s damaged.
- Faulty Device: Internally, outlets and switches can wear out. A failing light switch can have internal resistance. Likewise, an old outlet might have weakened contacts, causing partial connection (resistance) that heats up under load. If, say, you plug in a vacuum cleaner and notice the plug is hot when you remove it, and the outlet faceplate is hot too, that outlet is likely bad. It’s not securely holding the prongs, leading to arcing and heat. Replacing the outlet is the fix. Also, check the appliance’s plug – a loose outlet can even damage the plug’s prongs (you might see burn marks on them).
- Aluminum Wiring Issues: Some older Tulsa-area homes (particularly built in the late 1960s-1970s) may have aluminum branch-circuit wiring. Aluminum has a tendency to oxidize and connections can loosen over time, causing heat at switches/outlets. If you have aluminum wiring, and a device is warm, that’s a red flag – the connection might be failing. This often requires a special fix: either pigtailing with copper and special connectors or replacing devices with ones rated for aluminum (CO/ALR-rated) and using antioxidant compounds. This should be handled by an electrician familiar with aluminum wire mitigation.
- What To Do: Immediately stop using a hot outlet or switch. Turn off the circuit at the breaker if possible. Feel other outlets on that circuit – are they warm too, or just one? Sometimes the problem lies elsewhere on the circuit but manifests in one location. Either way, call a professional electrician soon. As mentioned earlier, warm outlets are a serious warning sign that shouldn’t be ignored. While waiting for service, do not plug things into a hot outlet or continue using a hot switch – leave it off. If it’s extremely hot and you smell burning, treat it as an emergency (call an electrician immediately or even the fire department if you think something’s burning in the wall).
One thing to note: certain devices that consume power by design will be warm – for example, phone chargers or adapters plugged into an outlet can be warm (that’s normal for the charger, not the outlet itself). But the outlet’s faceplate and the switch toggle should remain at room temperature typically. Only dimmer sliders might be a bit warm.
In summary, heat indicates an issue. Overloads and loose connections are the common culprits, and both can lead to fires if not corrected. The National Fire Protection Association (NFPA) warns that wiring problems cause a large percentage of home fires. Warm switches/outlets are one of those problems. So if you ever notice a wall switch or outlet that’s warmer than the ambient wall, treat it seriously. My rule: warm is warning, hot is hazard – either way, get it checked out. In my work, I’ve found and fixed numerous overheating outlets before they could do real damage. Replacing a $3 outlet and fixing a connection is easy; rebuilding a house section after an electrical fire is not. Stay safe and never ignore heat on electrical devices.
Chapter 4: Safety Devices and Electrical Protection
Q9. What are GFCI outlets, and where should they be installed in my home?
GFCI outlets (Ground Fault Circuit Interrupters) are special receptacles designed to protect people from electrical shock. They constantly monitor the flow of electricity in a circuit, and if they detect even a tiny imbalance (as small as 4-6 milliamps) between the outgoing and returning currents, they quickly cut off power (as quickly as 1/40 of a second). Essentially, if electricity is going somewhere, it shouldn’t – like through a person’s body to ground – the GFCI trips and potentially saves a life.
You can recognize GFCI outlets by their built-in “TEST” and “RESET” buttons on the face. Now, where should they be installed? According to the National Electrical Code (NEC) and general safety guidelines, GFCI protection is required (and/or highly recommended) in any area where water and electricity might meet. Key locations include:
- Bathrooms – All bathroom outlets must be GFCI-protected. Think of electric razors, hairdryers, etc. near the sink or tub – GFCIs are essential there.
- Kitchens – Outlets serving kitchen countertops should be GFCI-protected. Also any outlet within 6 feet of a sink (which in a kitchen is basically all counter outlets). Modern code extends GFCI to outlets for dishwashers as well. Kitchens have a lot of appliances plus the presence of water, so GFCI is a must.
- Garages and Workshops – All garage outlets (where you might use power tools, etc.) require GFCI protection. Same for outlets in workshops or shed areas with concrete floors – concrete can be damp and conductive.
- Outdoor Outlets – Every exterior outlet in your home (front porch, back patio, etc.) must be GFCI-protected. Rain, sprinklers, or just damp air can make outdoor outlets dangerous without GFCI.
- Laundry/Utility Rooms – Outlets in laundry areas (within 6 feet of a utility sink or the washing machine outlet) should be GFCI. Washing machines nowadays require GFCI protection in many jurisdictions, as do outlets near water heaters or utility sinks.
- Basements and Crawl Spaces – If you have outlets in an unfinished basement or crawl space (areas prone to dampness), they should be GFCI. Finished basements also now require GFCI by code in many cases, since 2020 NEC expanded requirements to all basement outlets, finished or not, recognizing the potential dampness.
- Swimming Pool or Hot Tub Areas – Any outlets around a pool, hot tub, spa, or even near the perimeter of those (within a certain distance, usually all outdoor outlets within 20 feet of a pool) need GFCI. Also fountain pumps, pool pumps, and spa equipment have special GFCI requirements due to the very high risk if fault occurs.
- Kitchen Appliances – Some specific appliance outlets require GFCI: e.g., dishwashers (per latest code), outlets for refrigerators (if in garage or basement), or microwave nooks if near sink. The code has evolved, but as a rule, if water is anywhere near the appliance or it is in a damp location, use a GFCI.
In summary, GFCIs belong anywhere electricity might contact water or where you’re grounded (like concrete floors). The NEC mandated GFCIs in bathrooms starting way back (the 1970s), then gradually added kitchens, garages, outdoor areas, etc. Now we have fairly comprehensive coverage: bathrooms, kitchens, laundry rooms, garages, basements, crawl spaces, and outdoors all require GFCI outlets by modern standards. Even if your home predates some of these requirements, it’s highly wise to upgrade and install GFCIs in these locations. It’s a relatively quick upgrade that significantly enhances safety – GFCIs have been shown to dramatically reduce home electrocutions (by up to 80% since their introduction).
If you’re not sure if an outlet is GFCI-protected, look for the buttons. Sometimes, one GFCI outlet on a circuit will protect others downstream. For instance, you might only see one GFCI in your garage but it protects all garage and outdoor outlets. Test it to be sure (see Q11 about testing). If you find an outlet in a kitchen or bath that is not GFCI, I strongly recommend having one installed. As a professional, I always install GFCIs in required areas to meet code during any renovation or service upgrade. It’s about keeping your family safe from the very real danger of electric shock.
Q10. Should I have AFCI protection installed in bedrooms and living areas?
Yes, absolutely – if your home doesn’t already have AFCI (Arc-Fault Circuit Interrupter) protection in bedrooms and other living areas, it’s strongly recommended to install it. In fact, it’s been a code requirement for many years now in new construction to include AFCI protection on most circuits inside a home. Let me explain what AFCIs are and why they’re essential:
- What AFCIs Do: While GFCIs protect people from shock, AFCIs protect against fires caused by electrical arcing. An arc fault is an unintended electrical discharge – basically a spark – that happens either from damaged wires, loose connections, or cords that are pinched or deteriorated. These arcs can smolder and ignite surrounding materials (like wood framing or insulation) without ever drawing enough current to trip a regular breaker. An AFCI breaker (or outlet) detects the signature of dangerous arcing and will shut off the circuit before the arc can start a fire. They are smart devices that differentiate between normal arcs (like the tiny ones in a light switch or a vacuum cleaner motor) and bad arcs (like a wire sparking due to insulation failure).
- Where They’re Required: The NEC first required AFCIs in bedrooms in 2002 (because many house fires start there, often from cords damaged by furniture, etc.). Over subsequent code updates, the requirement expanded. As of the 2020 NEC, virtually all 120-volt circuits in living spaces (bedrooms, living rooms, dining rooms, hallways, closets, etc.) must have AFCI protection. This includes kitchens and laundry areas as well, which were added in 2014. So nowadays, any habitable room’s outlets and lights should be on an AFCI breaker. Exceptions are typically garages, bathrooms, and exterior circuits (those focus on GFCI). So, yes – bedrooms and living areas definitely should be on AFCI-protected circuits by today’s standards.
- Why You Should Have Them: Even if your local code doesn’t require retrofitting them, it’s a smart safety upgrade. Older wiring, especially, can develop hidden issues. For instance, in older Tulsa homes, I’ve encountered knob-and-tube wiring or old cloth-insulated wires that over time get brittle – high risk for arc faults. Also, aluminum wiring (if your home has it from the 70s) is notorious for loose connections and arcing. An AFCI breaker gives an extra layer of defense. The NFPA notes that arc faults are a leading cause of electrical fires (tens of thousands per year). AFCIs address this. They have been shown to prevent many fires. In essence, GFCIs protect people; AFCIs protect property (and people indirectly) by preventing fires.
- How to Install: Typically, AFCI protection is provided by special AFCI circuit breakers that replace your standard breakers in the main panel. You can also get combination devices like dual-function breakers (AFCI+GFCI in one) for kitchens or laundry that need both protections. If you don’t want to (or can’t) replace a breaker, there are also AFCI outlets that can be installed at the first outlet of a circuit to protect the rest (similar to GFCI outlets). But breaker types are more common for whole-circuit protection. Installing these usually requires an electrician, as it involves working in the panel.
- Nuisance Tripping? Early models of AFCIs had some issues with nuisance tripping (for example, certain vacuum cleaners or older dimmer switches would trip them). The technology has improved significantly. Modern AFCIs are quite reliable. If one ever trips, it’s usually for a good reason – either a real arc or a device that’s genuinely faulty. If you find one circuit keeps tripping its AFCI, an electrician can troubleshoot whether it’s a bad appliance, a wiring issue, or a bad breaker. But these inconveniences are minor compared to the safety benefit.
So, to answer the question: Yes, you should have AFCI protection in bedrooms and living areas. In fact, as a master electrician, whenever I upgrade an electrical panel or do significant wiring in a home, I always bring it up to current code by installing AFCI breakers on the required circuits. It’s not just about code compliance; it’s about making your home safer. Many homeowners aren’t aware of AFCIs because they don’t have the obvious “press button” like GFCIs – but they are silently protecting your home in the background. If your home was built before the mid-2000s and hasn’t had electrical updates, it likely does not have AFCIs yet, so it’s worth discussing an upgrade. The peace of mind knowing the risk of an electrical fire is greatly reduced is well worth it. The NEC (2023) essentially says all common areas and bedrooms, etc., need AFCI. I’d mirror that advice for any home, old or new.
Q11. How often should I test safety devices like GFCIs and AFCIs?
Both GFCI and AFCI devices have test functions built in, and regular testing is important to ensure they’re working properly. These devices are your silent guardians against shock and fire, but like any mechanical/electrical device, they can potentially fail. Here’s how often and how to test them:
- GFCI Outlets: The standard recommendation (from OSHA, UL, and device manufacturers) is to test your GFCIs monthly. In practice, I find many homeowners don’t do it that frequently, but let’s say at least a few times a year or whenever you think of it (for example, when you change clocks for daylight savings, or when you test your smoke alarms, also test GFCIs). How to test: It’s simple – push the “TEST” button on the GFCI outlet. It should immediately trip, which will click the reset button out and cut power to any device plugged in. To confirm, whatever’s plugged (say a night light) should go off. Then press “RESET” and ensure power is restored. If the GFCI does not trip when you press test (power stays on, or the reset button doesn’t pop out), the device is bad and should be replaced. Also, if it trips but won’t reset (and you’re sure there’s no fault on the circuit), that could mean it failed as well. Over time, GFCIs can wear out – I’ve seen many that would not trip due to internal corrosion or electrical failure. That defeats their purpose, so testing is crucial.
- GFCI Circuit Breakers: These are GFCI devices in your panel (with a test button on the breaker itself). Test those monthly as well. Press the TEST button on the breaker; it should click to the tripped position. Then you have to flip it off and back on to reset. If it doesn’t trip, or feels stuck, have it checked/replaced.
- AFCI Circuit Breakers: AFCI breakers also should be tested about once a month (or at least a few times per year). They have a TEST button on them in the panel (usually colored). With the breaker in the ON position, pressing the test will cause it to trip (the handle moves to the middle or off). This verifies the internal detection circuitry and tripping mechanism works. Then you reset the breaker like normal. If it doesn’t trip when you hit test, the AFCI may not be providing protection – it should be looked at. The Electrical Safety Foundation International (ESFI) recommends monthly testing of AFCIs, same as GFCIs. It’s easy to forget because the test buttons are in the panel (and many folks rarely open their panel). But it’s a good habit to test them periodically. Perhaps put a reminder on your calendar every few months.
- AFCI Outlets: Less common, but if you have any receptacles that are combination AFCI (these look similar to GFCIs with buttons), test them like GFCIs monthly as well.
- Surge Protectors: Whole-house surge protectors often have an indicator light (not exactly a test button, though some have a self-test). For plug-in power strips with surge protection, there’s usually a little LED that says “protected” – check it occasionally; if it’s out, the MOVs might be spent and you should replace the strip. There’s no monthly test per se, but keep an eye on status.
Regular testing is important because these devices won’t necessarily show you they’re bad until it’s too late. A GFCI could silently fail and you wouldn’t know until someone gets a shock and it doesn’t trip. That’s why pressing that test button is critical – it’s like a fire drill for the outlet. The good news is that modern GFCIs have improved self-monitoring (some will actually blink or refuse to reset if they fail internal diagnostics). But not all devices have that, especially older ones.
From a practical perspective, I try to remind my customers: Test GFCI outlets monthly (press test, then reset). Test AFCI breakers at least twice a year (if not monthly). It literally takes seconds, and you ensure these life-saving devices are operational. If any of them fail the test or behave oddly (e.g., a GFCI won’t reset even after you remove all loads and check there’s power to it), go ahead and have it replaced. GFCI/AFCI devices aren’t terribly expensive, and they significantly reduce risk.
One final tip: after testing (and resetting) your GFCIs, go around and check that things plugged into the protected circuits came back on. Occasionally, a GFCI might control outlets in another room you forgot about – testing is a good way to discover which outlets are on the load side of a GFCI. If something didn’t turn back on, you might have missed resetting a tripped GFCI somewhere.
Q12. What surge protection options are available for my home?
Electrical surges – sudden spikes in voltage – can damage or destroy sensitive electronics and appliances in your home. Here in Oklahoma, where we get plenty of thunderstorms (and the occasional utility surge), it’s smart to have surge protection. There are essentially two levels of surge protection to consider:
- Point-of-Use Surge Protectors: These are the familiar power strip surge protectors or outlet receptacles with built-in surge suppression. You plug your devices (TV, computer, etc.) into the strip, and it absorbs excess voltage if a surge occurs. They typically use components called MOVs (Metal Oxide Varistors) that shunt high voltage to ground. These are great for protecting individual expensive electronics. Always look for a UL-rated transient voltage surge suppressor (TVSS) with a good joule rating (higher joules = can absorb more surge energy). For example, your home entertainment center and office computer setups should all be plugged into quality surge protector strips – not just basic power strips. The downside is you have to remember to use them, and they only protect the devices plugged into them (not hard-wired appliances).
- Whole-House Surge Protection: This is a more comprehensive solution. A whole-home surge protector, also known as a surge protective device (SPD), is typically installed at your main electrical panel (or sometimes at the electric meter). It shunts surges coming in from the outside (like lightning-induced surges on the power lines) away from your home’s circuits. It basically sits in parallel with your panel and when a surge hits, it diverts the extra voltage to ground, protecting everything in the house at once. These devices can protect against big surges that would overwhelm plug-in strips – for example, a nearby lightning strike or a utility transformer incident can send thousands of volts down the line. A whole-house SPD will clamp that down to a manageable level.
- Advantages: Whole-house protectors protect large appliances that aren’t typically plugged into point-of-use strips – things like your HVAC unit, refrigerator, stove, washer, dryer – all the expensive 240V appliances. They also add a layer of protection for everything else, so your point-of-use strips don’t have to absorb the full brunt of a surge. Think of it like a two-stage defense: the panel SPD takes out the big surge, and your power strip takes care of any residual little surge that sneaks through. In fact, layering surge protection is the best practice. Many insurance companies and electricians recommend having both a whole-house device and localized protectors for sensitive electronics.
- Installation: These are typically installed by an electrician. Some models snap into the panel like a double-pole breaker, others are a separate box mounted next to the panel and wired in. They need a connection to the panel’s bus (hot wires) and a good ground connection. It’s usually a fairly quick installation – perhaps an hour. I’ve installed many in the Tulsa area, especially for homeowners who have a lot of electronics or an expensive new HVAC system they want to safeguard.
- Capability: A good whole-home SPD will clamp surges to around 600 volts or less for common surges (still higher than normal 120 V, but low enough to prevent damage). They respond in nanoseconds to divert the surge. Some units even come with indicator lights or alarms to show if they’ve taken a hit and need replacement (because SPDs can wear out after a certain number of surges).
Other specialized options include:
- Surge Protective Receptacles: You can get wall outlets with built-in surge protection (for example, a special receptacle for your home office or entertainment center). These are less common, since most people use strips or whole-house, but they exist.
- Telephone/Internet Surge Protectors and Coax protectors: Surges can also enter via phone lines, cable TV, or satellite dish cables. If you have a wired telephone line or cable internet, consider small surge protectors for those lines too, especially if they connect to expensive equipment like a modem, router, or TV. Many power strip units have connectors for phone or coax lines to route them through a surge suppressor.
- Uninterruptible Power Supplies (UPS): Many UPS units (battery backup for computers) also include excellent surge protection and voltage regulation. If you work from home with critical electronics, a UPS can both smooth out power fluctuations and cover brief outages, as well as protect from surges.
Summary: For full home protection, I recommend a whole-house surge protector at the panel and point-of-use protectors for sensitive electronics. Whole-house SPDs will handle the big external surges (like lightning on the utility lines or surges from power company switching), preventing high voltage from frying your wiring and appliances. Meanwhile, your plug-in strips will handle any smaller, internal surges (like static discharge or minor spikes from motor appliances turning on/off).
It’s worth noting that a lot of surges (estimates say 60-80%) actually originate inside the home – for example, when your AC compressor or refrigerator motor turns off, the sudden change can cause a small surge in the house wiring. Whole-house SPDs help with those too by dampening the effect, and point-of-use protectors catch the rest. The cost of installing surge protection is relatively low compared to the value of your electronics and appliances (imagine the cost to replace a blown HVAC control board, or all the TVs and computers in your house). Plus, many home insurance companies now recommend or even give discounts for having a whole-house surge protector, because it reduces claims.
In the end, think of surge protection as cheap insurance. Given the options available, there’s really no reason not to have both levels in place. In my own home, I’ve installed a panel surge protector and use quality surge strips – and I sleep better during our intense summer lightning storms knowing my gear is protected.
Q13. How can I reduce the risk of electrical fires in my home?
Electrical fires are a serious concern – they account for a significant portion of house fires. The good news is, by following good practices and keeping your electrical system in shape, you can greatly reduce the risk. Here are the top measures to prevent electrical fires:
- Don’t Overload Circuits or Outlets: Overloading is a common cause of overheated wires. Plugging too many high-wattage appliances into the same outlet or power strip can overdraw the circuit. Avoid using multi-plug adapters that cram multiple plugs into one receptacle. Instead, spread out appliances to different circuits. In the kitchen, for example, don’t run the toaster and microwave on the same outlet if they trip a breaker. If you find you need more outlets, have them properly installed. Also never “daisy-chain” power strips (plugging one power strip into another) – that can defeat the internal breaker and lead to overload. Each outlet is designed for a specific current (usually 15 or 20 amps); respect that limit. If fuses or breakers do blow, don’t keep resetting them without understanding why – frequent trips mean you need an electrician to possibly add a new circuit or fix an issue.
- Use the Right Size Fuses or Breakers: In older homes with fuse panels, make sure you use the proper amp fuse for the circuit. Some people made the dangerous mistake of putting a penny behind a fuse or using a 30A fuse on a 15A circuit to stop it from blowing – that can allow the wires to carry way more current than they’re safe for, turning them into a potential fire hazard. For breakers, never upsize a breaker without upgrading the wire appropriately. Always replace like-for-like (15A with 15A, etc.).
- Replace Damaged Cords and Wiring: Frayed, cracked, or damaged electrical cords are a fire waiting to happen. Inspect appliance cords (phone chargers, lamps, extension cords, etc.) regularly. If you see exposed wires or cracked insulation, stop using it and replace it. Do not repair it with just tape unless it’s a very temporary fix; even then, replacement is best. Never run extension cords under rugs or through doorways – they can fray and overheat out of sight. Extension cords should only be for temporary use, not permanent wiring. If you find you’re relying on extension cords routinely, it’s safer to have an electrician install new outlets where needed.
- Keep Combustibles Away from Electrical Sources: Make sure things like drapes, bedding, or paper aren’t resting on electrical lamps or heaters. Lamps: Use bulbs of the proper wattage for fixtures (if a lamp says max 60W, don’t put a 100W incandescent in there – it can overheat the lamp or scorch nearby materials). Space Heaters: If you use portable heaters, keep them at least 3 feet from anything flammable and plug them directly into a wall outlet (not a power strip or extension cord), as they draw a lot of current. Uncoil extension cords fully when in use – coiled cords can overheat.
- Install and Maintain Safety Devices (AFCIs, GFCIs, Smoke Alarms): We’ve talked about GFCIs and AFCIs. AFCIs in your panel help prevent arc-related fires by shutting off dangerous arcing faults. If your home doesn’t have them, consider upgrading (especially for circuits in bedrooms and living areas). GFCIs (in kitchens, baths, outdoors) don’t directly prevent fires, but they prevent shocks which indirectly keeps you safer. Smoke detectors aren’t prevention, but they are vital for early warning – make sure you have working smoke alarms on each level, inside bedrooms, etc. They’ll alert you if an electrical fire (or any fire) starts, so you can take action or escape. Check them monthly and change batteries yearly if they’re battery-operated.
- Regular Electrical Inspections: Especially if you have an older home (over 40 years old) or have made major additions, have an electrician do a whole-home electrical safety inspection periodically (every 5-10 years, or when you move into a home). We look for things like outdated wiring (e.g., knob-and-tube, or cloth-insulated wire), aluminum branch wiring, undersized wires, overloaded panels, etc., and can recommend fixes. An inspection will also catch loose connections or signs of overheating: for example, in some inspections I open the panel and see a breaker with a burnt wire, or outlet connections that are loose, etc. Catching those and fixing them significantly reduces fire risk.
- Outdated Equipment: If your home still has an old fuse box or a very old breaker panel (like 1950s era), consider upgrading to a modern panel with proper breakers and more capacity. Likewise, if you have known problematic panels (Federal Pacific or Zinsco are infamous for not tripping properly and causing fires), replace them. Update any worn-out outlets or switches (as discussed in Q6). Also replace any ungrounded two-prong outlets – not only are they not as safe for surge protection, but people tend to use cheater plugs which can introduce hazards.
- Good Habits: A few simple habits go a long way: don’t leave high-wattage appliances running unattended (e.g., don’t run the dryer or dishwasher when you’re asleep or out of the house – if an electrical component malfunctions and catches fire, you want to be around to catch it early). Unplug heat-producing appliances when not in use (irons, toasters, space heaters). Use surge protectors for expensive electronics to prevent fire-inducing damage from surges. Keep electrical panels accessible and labeled – in case of emergency you want to shut power off quickly. Also, avoid DIY wiring unless you know what you’re doing – improper connections can cause fires. If you do DIY, follow code and have it inspected.
- Clean Electrical Devices: Dust can accumulate in things like space heaters or baseboard heaters and act as kindling if the element overheats. Keep them clean and free of dust. Same with computer vents and power supplies – vacuum them periodically.
In summary, preventing electrical fires comes down to keeping your electrical system in good repair, not over-stressing it, and adding modern safety layers. By replacing damaged cords, not overloading outlets, using the correct bulbs and fuses, installing GFCIs/AFCIs, and being attentive to warning signs (as we discussed earlier), you greatly reduce the risk of an electrical ignition.
I always tell homeowners: electricity is safe when contained in the wires and devices properly; it becomes dangerous only when it escapes its intended path – through a short, an overload, or a bad connection. All the steps above are about keeping the electricity flowing correctly and shutting it off when something goes wrong. Implementing them will significantly reduce the risk of electrical fires in your home. And of course, having working smoke alarms is the final backup – if something does spark, you’ll be alerted right away and can respond or get out.
Chapter 5: DIY vs. Professional Electrical Work
Q14. Can I install a ceiling fan or new light fixture myself, or should I hire a professional?
Installing a ceiling fan or light fixture is a common project for handy homeowners. The answer really depends on your comfort level with electrical work and the complexity of the installation. Here’s a guide to help you decide and some important considerations:
You Might Do It Yourself IF:
- There’s Already an Approved Electrical Box: If you are simply replacing an existing light fixture with a new one, or swapping out a light for a ceiling fan, and that electrical box in the ceiling is already fan-rated (meaning it’s sturdy enough to support the fan’s weight and movement), then the wiring part is usually straightforward. Typically it’s matching the wires (black to black, white to white, ground to ground) using wire connectors. Many homeowners can handle this if they carefully turn off the circuit breaker, verify power is off with a tester, and follow the fixture’s instructions. Minor lighting fixture replacements (like installing a new chandelier or dining room light) are similarly DIY-friendly, provided you have basic knowledge. Remember, always support the fixture securely while wiring.
- You Have Basic Electrical Knowledge: You should know how to safely turn off power and confirm it’s off, how to connect wires securely (using proper wire connectors, not leaving copper exposed), and how to mount the fixture according to instructions. The connections themselves for a light or fan are usually color-coded and explained in manuals.
- No New Wiring is Required: The job stays simpler if you’re not running new cables or altering circuits – just using the existing wiring in the ceiling box. If you start needing to run a new switch leg, or install a new electrical box where one didn’t exist, that gets more complex (and typically not a DIY for most).
If all the above checks out and you feel confident, you could attempt it yourself. Many people around Tulsa do install their own ceiling fans and lights. Just take your time, follow all instructions, and if something seems confusing, stop and consult a pro.
Reasons to Consider Hiring a Professional:
- Support and Safety Concerns: Ceiling fans are heavy and they vibrate when running. They must be mounted to an electrical box labeled as “Fan Support” (rated for typically 50-70 lbs). Many older homes have just a light-weight plastic or thin metal box in the ceiling for light fixtures, which is not sufficient for a fan. If you’re adding a fan where one wasn’t before, an electrician will install an appropriate fan brace or new fan-rated box between the joists. This often involves accessing the attic or using an expanding brace bar. It’s a bit more work and tools (and often why people call us for fans). If a fan isn’t properly secured, it could work loose, wobble badly, or even fall – definitely a safety hazard.
- Wiring Complexity: If you want the fan/light to be controlled by separate switches (one for fan, one for light), you need the correct two-circuit cable running to the switch (or use a remote control unit in the fan canopy). If that wiring isn’t already in place, running new cable through walls/ceilings is more advanced. Similarly, if there’s no existing power where you want the fixture (say you want to add recessed lights where none exist), that’s a job requiring pulling new wires, likely permits, and certainly knowledge of code (drilling framing, fishing wires, notching joists, etc. to get it wired). For new wiring, I strongly recommend hiring an electrician. We ensure it’s done safely and up to code, with minimal damage to walls.
- Local Code and Permits: Some jurisdictions require a permit for installing a new circuit or even a fan, especially if it involves running new cable or a new box (as it’s an addition to the electrical system). We know the Tulsa area codes and can pull a permit if needed and get it inspected. Usually, replacing an existing fixture doesn’t need a permit, but adding new ones often does. A professional will handle that for you.
- Ensuring Connections and Balance: Electricians will ensure all connections are tight and secure (loose connections in a fan can cause it to malfunction or even arc – see Q7 about buzzing noises). We also know to connect the ground wires properly (very important for fixtures for safety). With fans, we will also help assemble and balance the blades so it doesn’t wobble. A wobbling fan not only is annoying but can loosen connections over time if severe.
- High Ceilings or Tricky Installations: If you have a very high ceiling or hard-to-reach area, proper scaffolding or tall ladders may be needed. Electricians are equipped for that and used to working at heights. Your safety doing it yourself is a consideration – falling off a ladder is a real risk for the inexperienced.
The Bottom Line:
If it’s a like-for-like replacement of a light or fan, in a typical situation, and you’re comfortable with basic wiring, you could do it yourself with caution. Always cut power at the breaker, double-check wires with a voltage tester, and follow the fixture’s guide. However, if you have any doubts, or if the installation involves new wiring, structural concerns, or code issues, you should hire a professional electrician.
I often get called to finish DIY projects when a homeowner finds some wiring confusing, or they discover the existing setup isn’t as straightforward as expected. There’s no shame in that – it’s better to call than to make a mistake. Electricity can be dangerous if handled improperly, and improper installations can lead to shocks or fires down the line. A licensed electrician (like myself) will do the job safely, ensure the fan or fixture is well-supported and wired correctly, and typically pretty quickly (we’ve done hundreds of them).
Also, consider the value of your time and effort. Sometimes what might take you an entire afternoon (and a lot of frustration with tiny screws and cramped spaces) might take a pro an hour.
Lastly, check your local regulations: In some cities, homeowners are allowed to do electrical work on their own residence (often requiring a permit and inspection). In others, certain work must be done by a licensed electrician. Tulsa area homeowners generally can replace fixtures, but adding new circuits might require licensure. When in doubt, it’s safest to involve a licensed electrician to ensure everything is safe and compliant. Remember – electrical work by a professional is an investment in your home’s safety.
Q19. Can I fix loose electrical connections on my own?
Loose electrical connections – such as a loose outlet wire, a switch terminal, or a wire nut in a junction box – are a common cause of issues like flickering lights, intermittent power, or buzzing sounds. They also pose a fire risk due to arcing (as we’ve discussed). Whether you can fix them on your own depends on the situation, but here’s guidance:
If the loose connection is accessible and straightforward:
For example, say you have an outlet that is working intermittently, and upon removing the cover (with power off), you find that one of the wires slipped off its screw or a backstab connector. If you are comfortable working with wiring, you could:
- Turn off the breaker to that circuit and verify power is off with a tester.
- Remove the outlet from the wall and re-attach the wire properly – preferably to the side screw terminal (backstab push-in connections are more prone to loosening). Tighten it firmly under the screw. Ensure no insulation is under the screw and no copper is exposed outside.
- Inspect for any heat damage. If the wire looks charred or the outlet plastic is melted where it was loose (a common occurrence), you should replace the outlet and cut back and re-strip the wire to a clean section.
- Put everything back carefully, ensuring the outlet is securely mounted (loose mounting can cause the wires to loosen again).
For light switches, similarly, you might find a loose terminal screw – you can tighten that (with power off) or better yet, re-strip the wire end and wrap it properly under the screw then tighten.
However, consider these cautions:
- Often, by the time you notice a loose connection (because it caused a problem), it might have already been arcing and overheating. This can damage the device (outlet/switch) and the wire end. Simply tightening a screw on a charred connection might not be enough – the device might need to be replaced.
- If a connection came loose once, why did it come loose? If it was improperly done last time (under-torqued screw or a backstab that wiggled out), your correction might solve it. But if it’s a symptom of something like aluminum wiring (which expands and contracts, loosening over time) or vibration, you need to address the bigger issue. Aluminum wiring, in particular, should be handled by a professional because it requires special connectors and anti-oxidant compounds to reconnect safely.
- If the loose connection is somewhere not easily accessible (like a wire nut in a ceiling box or a junction in the attic), you have to be very sure you identify the right one and fix it correctly. Simply twisting a wire nut tighter is not always a fix if the wires were not properly pre-twisted or if they are different sizes, etc. There is a bit of skill to making a good, tight splice.
When to call a professional:
- Panel Connections: If you suspect a loose connection on a breaker or neutral bar in your electrical panel (signs might be flickering in multiple circuits, a buzzing breaker, or a breaker that’s loose in its slot), do not go poking in the panel unless you truly know what you’re doing. The panel has live, unfused parts that even with the main off can be energized (the service lugs). It’s best to have an electrician tighten any panel lugs or breakers. We use torque screwdrivers to ensure they are to spec. In fact, many electrical fires originate in panels from loose lugs – we check those on inspections and tighten if needed to manufacturers’ torque specs.
- Multiple Loose Connections / Old Wiring: If your home’s wiring is generally in poor shape (outlets that don’t hold plugs, multiple flickering lights, several warm switches), you likely have widespread loose connections or outdated devices. It might be worth a comprehensive fix by a pro – sometimes it’s easier for me to go through and replace all the old outlets and switches and tighten all neutrals in the panel than for you to chase individual issues one by one. This “tune-up” can be done in a few hours and brings everything up to snuff.
- Signs of Arcing or Damage: If a loose connection has been arcing for a while, the conductors could be damaged (brittle or oxidized). Simply tightening might not make a good low-resistance connection. An electrician can cut back the wire and make a fresh connection or use a proper splice connector if needed. We’ll also identify if there’s any further issue down the line – e.g., maybe the loose neutral in one outlet was affecting other outlets (common with daisy-chained wiring), so we’ll check those too.
In general: You can handle straightforward loose connections if you have some DIY electrical experience: e.g., outlet backstab failures, loose light fixture wire nuts (common after someone DIY installed a light and didn’t twist tightly), or loose lamp socket connections in a light. Just always ensure power is off, double-check, and make the connections mechanically solid and electrically secure. A proper wire connection should be tight enough that even before you solder or cap (though we don’t solder house wires, just a phrase) it’s firm. Use appropriate connectors (don’t tape wires together, use a wire nut or approved push-in connector like Wago if you know how).
If at any point you feel unsure, err on the side of safety and call an electrician. We have the advantage of experience: we know, for instance, that a buzzing outlet or light could indicate a loose neutral somewhere else, and we know how to systematically track it down. We also can test the circuit after fixing to ensure it’s drawing the expected current and not overheating.
Finally, after fixing any connection yourself, monitor it closely. Does the problem go away (no more flicker, no more heat or buzz)? If you still notice anything odd, then the issue might not be fully resolved, and it’s time for a pro to do a deeper investigation. Remember, loose connections cause arcing, and arcing causes fires – so they are not to be taken lightly. If you fix it, fix it right, or call someone who will.
Chapter 6: Electrical Panel Upgrades and Home Wiring Safety
Q15. Do I need a service panel upgrade to handle modern appliances and electronics?
If your home is older or you’ve added a lot of new electrical loads, you might be wondering if your electrical service panel (a.k.a. breaker box) is sufficient. There are a few key indicators that you may need an upgrade, as well as benefits to doing so:
- Capacity (Amperage) of Existing Service: Many older homes in the Tulsa area built mid-20th century have either a 60-amp or 100-amp electrical service. Modern standard for single-family homes is usually 200 amps. If your panel is rated for less (look at the main breaker – e.g., “100” or “60”), and you’re running lots of new appliances (central A/C, electric oven, clothes dryer, maybe an EV charger, etc.), you might be at or beyond safe capacity. A telltale sign is frequently tripping main breaker or multiple breakers when several appliances run. Also, insurance companies sometimes charge more or even refuse homes with very outdated small services (like 60A) because of fire risk. If you have 100A service and electric heat/AC, an electric water heater, and modern kitchen appliances, you’re likely borderline on capacity. A 200A panel upgrade would give you more headroom and circuits.
- Modern Appliance Needs: Today’s homes have many more electrical devices. Kitchens now might have microwaves, dishwashers, toaster ovens, etc. If you’re renovating a kitchen, code will require dedicated circuits for each major appliance and at least two 20A circuits for countertops. Older panels often don’t have enough spaces to add those circuits. If you’re planning for an electric car charger (EV charging can be a 40A or 50A circuit by itself) or adding a workshop with power tools, those are power-hungry additions. If your panel has no spare breaker slots (or only a couple left), an upgrade or a subpanel might be needed to safely accommodate them.
- Signs of Overload: As mentioned earlier, frequently blown fuses or tripped breakers are a sign your electrical system may be overburdened. Lights dimming when major appliances turn on (beyond a slight flicker) could indicate the service is stretched thin. Also, if you hear buzzing at the panel or the panel feels warm, that’s a warning (could be overload or a failing component).
- Outdated Panels: Some older panels (brand names like Federal Pacific, Zinsco, or really old fuse boxes) are known to be unsafe or inadequate. For example, Federal Pacific breakers often failed to trip when they should, leading to fire hazards. If your home has one of these, you should strongly consider upgrading for safety, even if capacity wasn’t an issue. Also, if you still have a fuse box, many of those were 60A or 100A and often have multiple circuits connected to one fuse (double taps). Upgrading to breakers is recommended.
Benefits of a Service Panel Upgrade:
- Safety and Reliability: New panels are designed to current safety standards. It reduces the risk of overheating connections and gives you room to install AFCI and GFCI breakers as needed. A new 200A panel, with new breakers, means all those old possibly corroded breakers or loose fuse connections are gone. If you upgrade from an old 60A service, you eliminate dangerous situations where people might have over-fused circuits.
- Room for Expansion: A larger panel (with more circuits) allows you to distribute your electrical loads properly. Instead of having, say, kitchen, dining, and living room all jammed on one circuit (common in 1950s homes), you can separate them, reducing overloads. Modern living often necessitates more circuits. By upgrading, you might go from a 12-circuit box to a 30 or 40-circuit panel, for example.
- Handling Modern Loads: With a higher-amperage service, you can run multiple major appliances simultaneously without issue. For instance, running the oven, dryer, and A/C all at once on a 100A service might trip the main breaker on a hot day; on a 200A, it’s no problem.
- Home Value and Insurance: Upgrading electrical service is often seen as a value booster for home resale, and insurers prefer it. It shows the home is updated to handle modern electrical demands. Some home insurance companies give better rates or at least fewer hassles if you have 200A breaker panel versus an old fuse box.
Do you need an upgrade? It comes down to whether your existing system is frequently taxed or outdated. If you live in a fairly modern home (built in last 20-30 years) with 150-200A service, you likely have enough capacity for typical appliances unless you’re adding something big (like an EV charger or second kitchen). But if your home is older or you’re doing significant additions (adding a new HVAC system, etc.), you might need it.
I often consult with homeowners by calculating the load on the house. There are formulas (NEC load calculation) to see if say a 125A service is enough for X square footage + appliances. If it’s marginal, I recommend going up. Also consider future needs – if you might get an electric vehicle or convert a garage to a workshop, plan ahead with the service size.
To summarize: If you have an old or small electrical panel, or you experience power limitations, a service panel upgrade is likely needed and certainly beneficial. Upgrading the panel and service typically means a utility disconnect/reconnect, new meter if necessary, new panel with more breakers, and possibly new service entrance cable. It’s a job for a licensed electrician and typically done with permit and utility coordination (we’d schedule with PSO or local utility to kill power, etc.). Once done, you’ll have a modern, robust electrical system ready for all your appliances and gadgets.
Think of it as giving your home a bigger “electrical heart” to pump power wherever it’s needed. You’ll reduce nuisance breaker trips, improve safety, and be ready for the next big appliance you want to add. As one reference notes, upgrading service prevents overloaded circuits and ensures you have capacity for modern appliances and electronics – this sums it up well.
Q16. What are the benefits of upgrading my electrical panel or breaker box?
Upgrading your electrical panel (breaker box) can bring a host of benefits in terms of safety, convenience, and future-proofing. Some of the key advantages include:
- Improved Safety & Fire Prevention: Older panels or overcrowded panels can pose fire risks. New panels have safer breaker technology and robust bus bars. By upgrading, you eliminate issues like corroded connections, obsolete breakers that might not trip properly, and overloaded circuits. As discussed earlier, certain old panels (like FPE or Zinsco) had design flaws that could lead to breakers failing to trip. Replacing those with modern UL-listed panels significantly lowers your fire risk. Additionally, a new panel allows for installation of AFCI breakers, GFCI breakers, and surge protectors which further enhance safety. Essentially, you are reducing the risk of electrical fires by modernizing.
- Capacity for Modern Demand: A new panel often comes with a higher amperage service (e.g., 200A) and more breaker spaces. This means you can handle more appliances and circuits simultaneously without stressing the system. For example, you might add circuits for a home office, a second air conditioner, or an electric vehicle charger down the line. With an upgraded panel, you likely already have the capacity and breaker slots for those. No more juggling what’s on to avoid trips. It’s about “headroom” – you’re not running at the ragged edge of your electrical capacity.
- Reduced Nuisance Tripping & Better Reliability: If you’ve experienced frequent breaker trips in the past, an upgraded panel (with more circuits to spread out loads appropriately) will fix that. Each appliance or room can have its own dedicated circuit as intended. You’ll notice fewer overloaded situations. The overall reliability of your electrical system improves – connections are new and tight, breakers are brand new. Breakers can wear out from many trips; new ones reset that clock. So you’ll likely experience more stable power without flickers or trips when the system is properly balanced.
- Energy Efficiency & Savings: Upgrading an electrical panel itself doesn’t directly save energy (since it’s not consuming electricity), but indirectly: by having a properly functioning electrical system, your appliances may run more efficiently. For example, adequate voltage delivery to motors (like AC compressor, fridge) can help them run cooler and maybe last longer. Also, some older panels/power supplies had slight voltage drops; new ones might reduce that. The difference is small, but think of it like giving your devices a better environment to run in, which could extend their life.
- Home Value & Insurance: A new panel and service upgrade can increase your property value in the eyes of potential buyers. It’s one less thing they’ll worry about. When I provide documentation of a panel upgrade (permit/inspection details), homeowners often use it as a selling point: “New 200 Amp Electrical Service in 2025” in the listing. Insurance companies favor upgraded electrical systems too. Some insurers may give a bit of a break or at least remove any surcharge once you’ve replaced an old fuse box or known-problem panel with a safe modern one. It’s because you’ve mitigated a lot of fire risk.
- Accommodating New Technology: If you plan to adopt new technology – like solar panels with battery storage, a Level 2 EV charger, or a high-end HVAC system – an updated panel is often necessary. For example, many EV chargers require a 50A circuit; an older 100A service might not support adding that. A 200A service likely will. Similarly, if you ever consider adding a home backup generator or transfer switch, having a modern panel makes integration easier (many new panels are “generator ready” or easily fitted with an interlock or transfer switch). Essentially, you’re future-proofing your home electrically.
- Organization and Convenience: A new panel means all your circuits can be neatly labeled and organized. No more mystery breakers or double-tapped breakers powering two circuits unsafely. We often clean up lots of wiring splices or messy panel guts in an upgrade, leaving a tidy and serviceable installation. This makes any future electrical work easier and safer. It also can allow for add-ons like subpanels more easily if you expand (say you add a workshop, you can run a subpanel from a main 200A panel).
- Enhanced Features: Some modern panels come with options like smart breakers (that can connect to Wi-Fi for energy monitoring or remote trip alerts), combination AFCI/GFCI breakers for maximum protection, etc. Upgrading lets you incorporate these. Also, if your panel is in a damp area (like a garage or basement), new panels are better insulated and designed to handle that environment.
To illustrate: I often explain to customers, your electrical panel is the hub of your home’s electrical system. Upgrading it is akin to giving the home a new heart and nervous system. The benefits of upgrading your electrical system include increased safety, ability to handle modern appliances, improved efficiency, and higher home value.
One real-world example: I upgraded a 1950s home from a 60A fuse box to a 200A breaker panel. Before, the homeowner could not run the microwave and toaster without blowing a fuse, and the lights would dim whenever the window AC kicked on. After the upgrade (and adding a few circuits for kitchen and AC), those problems vanished. They also added a tankless electric water heater the next year, which wouldn’t have been possible on the old service. The peace of mind knowing the electrical system is solid and safe is perhaps the biggest benefit – it’s something you can’t really quantify, but you’ll certainly appreciate when you sleep at night not worrying about those old crackling fuses or an undersized system.
In short, an electrical panel upgrade brings your home up to speed with today’s electrical needs and safety standards. It’s a worthwhile investment if your current panel is outdated, undersized, or showing signs of trouble.
Q17. How do I know if my home’s wiring is outdated or unsafe?
Recognizing outdated or unsafe wiring is crucial, especially if you live in an older home (and around the Tulsa area we have plenty of homes built mid-20th century or earlier). Here are some signs and indicators that your wiring may need attention:
- Age of the Home / Wiring Type: If your home was built before, say, the late 1960s, it may have wiring that’s considered outdated by today’s standards. Examples:
- Knob-and-Tube Wiring (common from 1900-1940s) – this is the old two-wire system with porcelain knobs and tubes supporting single-insulated conductors. It has no ground wire and uses cloth/rubber insulation which can degrade. If you still have active knob-and-tube, that’s considered a fire risk in many cases and should be evaluated. Often it’s found in attics or crawl spaces. Some insurance companies won’t insure homes with knob-and-tube unless certified safe by an electrician.
- Cloth-Insulated Wiring (1940s-1960s) – even after knob-and-tube, some early NM (Romex) cables had cloth-braid insulation or rubber insulation that can become brittle. If you open a light switch and see frayed cloth on the wires, that’s old wiring. This stuff can be unsafe as the insulation can flake off, exposing conductors.
- Aluminum Branch Circuit Wiring (mid 1960s-1970s) – single-strand aluminum wire was used in some homes for outlets and lighting circuits (not the big aluminum service cables; those are normal). Aluminum wiring tends to oxidize and loosen at connections, posing a fire risk. Signs: your wiring might look silver-colored (not the coppery color) when you peek at it. If outlets/switches have “Al/Cu” or “CO/ALR” stamped on them, that suggests the home had aluminum wiring and someone installed correct compatible devices. If you suspect aluminum, have it inspected – solutions include special connectors or a complete copper rewiring.
- Two-Prong Outlets (No Ground): If your home still has many two-slot outlets (no third hole for ground), it likely means there’s no grounding conductor in those circuits. Ungrounded circuits are a shock and equipment damage hazard (e.g., not safe for modern electronics needing surge protection). While not necessarily an imminent fire risk, it is outdated. The presence of only 2-prong outlets in much of the house says the wiring is likely from pre-1960s.
- Insufficient Outlets and Overuse of Extension Cords: Older wiring systems often didn’t put outlets on every wall like today’s code requires. If you find you have a scarcity of outlets and rely on a tangle of extension cords and power strips, it’s a hint the electrical system wasn’t designed for modern usage. Not only is that inconvenient, but extension cords under rugs or overloaded strips are hazards themselves. The solution is to have more outlets added (which means new wiring runs in many cases).
- Frequent Electrical Problems: Are you experiencing many of the warning signs we listed in Q5? (flickering lights, tripping breakers, burning smells, etc.) Those can indicate wiring issues. For example, flickering lights and frequent breaker trips in an older home can indicate deteriorating wiring or connections behind the walls. If circuits trip with normal usage, maybe the wire gauge is too small or insulation is failing and causing shorting under load.
- Visual Inspection Clues: If you’re comfortable, you can take a look at the wiring visible in the attic, crawl space, or at the electrical panel. Look for cracked or missing insulation, or any charred areas on cables. Also check if there are lots of splices outside of junction boxes (wires twisted together and taped, lying loose) – that’s unsafe and not to code; all splices should be in boxes with covers. In older homes, sometimes amateur fixes leave splices in walls or attics without proper containment, which is a fire hazard.
- Panel Clues: The electrical panel can say a lot. Overcrowded or double-tapped breakers, fuses instead of breakers, or a very old panel brand can indicate the overall system is outdated. Likewise, if you see a lot of circuits with old cloth wires coming in, that’s a sign. A label of 60A or 100A main service is another clue it hasn’t been updated in a long time.
- No Grounding or Bonding: Modern wiring has a ground wire and the metal boxes, plumbing, etc. are bonded to ground. In older homes, sometimes none of the metal boxes are grounded. If you remove an outlet cover and see just two wires (black and white) and no bare copper, that circuit isn’t grounded (and likely old). This is outdated wiring. Also look at your water heater or other appliances – are there grounding wires clamped to the pipes? If not, the house might lack proper bonding.
- Heating and Dimming: If plugging in normal appliances causes outlets to get warm or lights to dim significantly, the branch wiring might be undersized or connections poor. For instance, I had a case where using the toaster oven would dim the breakfast nook lights heavily – the circuit was shared and had old 14 gauge aluminum wiring with high resistance. That was a sign to rewire that branch.
- Professional Inspection: Ultimately, having an electrician do an inspection is the best way to know. We have tools and knowledge: a thermal camera can see hot spots on wiring or breakers, an outlet tester can show open grounds or reversed polarity (a wiring error sign), and we just know what to look for in terms of wiring methods from certain eras. For example, if I enter an attic and see rubber insulated wires criss-crossing on ceramic knobs (knob-and-tube), I’ll immediately note that as outdated/unsafe by modern standards. Or if I open a switch and the insulation crumbles off the conductor, that circuit’s unsafe to use until repaired.
As the NFPA and other safety organizations note, older wiring methods often cannot safely handle the demands of today’s electrical loads or have degraded over time, posing safety risks. The bottom line: if your home’s wiring is old enough to vote (let’s say older than 50-60 years) and hasn’t been partially or fully replaced, it’s likely outdated.
If you suspect your wiring is outdated or unsafe from the above clues, you should consult a licensed electrician. Sometimes targeted upgrades can be done (like replacing just the kitchen circuits or the upstairs circuits that were problematic). In other cases, a whole-house rewire is recommended, especially if there’s pervasive knob-and-tube or aluminum. Yes, rewiring can be a big job (often requiring wall openings or fishing wires through cavities), but it drastically improves safety and reliability. Plus, you get grounded outlets everywhere, which is good for using modern electronics safely.
Remember, wiring doesn’t last forever. The copper might, but the insulation and connections do not. So knowing the condition and type of your home’s wiring – and upgrading it if needed – is crucial for preventing electrical fires and ensuring your home can meet your electrical needs safely. If any of the signs above ring true for your home, it’s worth getting a professional assessment.
Q18. What should I expect during a whole-home electrical inspection?
A whole-home electrical inspection is a thorough checkup of your home’s electrical system by a qualified electrician. Whether you’re purchasing a home, have just moved in, or simply want to proactively ensure safety (perhaps after reading all these warning signs!), an inspection is a smart move. Here’s what typically happens and what we look for:
- Panel Examination: We’ll start at the main service panel (breaker box). We’ll check the panel’s general condition – is it properly grounded and bonded, any rust or corrosion, and if it’s an older model, whether it has known issues. We’ll tighten connections on breakers and neutral bars if needed (loose neutrals are a common find). Using a thermal imaging camera, we may scan the panel while under load to see if any breakers or connections are running hot (indicating a problem). We’ll also note if the panel is undersized or overcrowded for the home’s needs (e.g., only a 100A service for a large home might be pointed out as a concern). All breakers will be checked that they are sized correctly relative to the wire gauge on them, and that no circuits are “double tapped” unless the breaker is rated for it.
- Circuit Breaker Functionality: We may do a quick test of GFCI and AFCI breakers in the panel (if present) by pressing the test buttons. If the home lacks AFCI where nowadays required (like bedrooms), we’d note that as an improvement for safety.
- Wiring Inspection: We’ll examine any exposed wiring in accessible areas: attic, crawl space, unfinished basement, garage, etc. We’re looking for wiring type (knob-and-tube, NM cable, BX/metal-clad, etc.), and its condition. Is the insulation intact or deteriorating? Are there signs of rodent damage (rats love chewing wiring)? We’ll also look for improper splices – for instance, wires joined outside of junction boxes, or too many wires crammed in a single box (overfill), or missing cover plates. If we find open splices or junctions without covers, we’ll definitely flag that to fix – that’s a fire hazard.
- Outlet and Switch Check: Often we’ll do a representative sample of outlets and switches throughout the house. We use an outlet tester, which can reveal common issues like open ground, reversed hot/neutral, open neutral, etc. We’ll insert it into several outlets in each room. GFCI outlets are tested with their test button and also using the tester’s GFCI test function to ensure they trip properly. Non-GFCI outlets near water (in older homes) will be recommended for GFCI upgrade. We also take note if outlets are two-prong (no ground) – that indicates ungrounded wiring; we’ll discuss options to upgrade those (rewire with ground, or at least GFCI protect them). We might remove a few outlet or switch covers to peek inside the box: checking for loose connections, backstabbed wires, signs of overheating (melted insulation or charring). We’ll also see if the devices themselves are old (like original from the 60s) – sometimes those old outlets lose tension and need replacing.
- Lighting and Fixtures: We check light fixtures, especially in attics or closets, to see if they are properly enclosed (no exposed splices), have proper bulbs (not an oversized bulb that could overheat). If there are ceiling fans, we might gently try shaking them to ensure they’re mounted securely (not wobbling dangerously). We test any exhaust fans or built-in appliances to ensure they’re on dedicated circuits if needed.
- Grounding System: A critical part is verifying the grounding and bonding of the electrical system. We’ll look for the grounding electrode conductor – the thick copper wire that should connect your panel to grounding electrodes (ground rods outside, or a Ufer ground in foundation, and possibly to the cold water pipe if metal). We check if the connections are tight and the electrodes are present (sometimes we find no proper ground rods installed in older homes, so we’d recommend adding them). Bonding: we ensure things like the water heater, gas pipes, metal water pipes, etc., are bonded to ground. In older homes, lack of proper bonding is common. We also test that 3-prong outlets are indeed grounded (the outlet tester helps here – if it shows “open ground”, that’s an issue to fix).
- Miscellaneous Code Items: We note if smoke detectors and carbon monoxide detectors are present and up to current standards (should be one in each bedroom, etc., interconnected). We’ll recommend adding or updating them if not. We look at outside outlets (should be GFCI and weather-protected) – if an exterior outlet has no weather cover or GFCI, we’ll flag that. We also look at any recent wiring we can see – sometimes we catch not-to-code handyman wiring (like an extension cord feeding a light permanently, or non-metallic cable run on the surface of a wall without protection). We note if any extension cords are being used in lieu of permanent wiring (e.g., in a garage fridge plugged into an extension cord – we’d suggest adding an outlet there).
- Appliance Connections: We might peek behind major appliances. For instance, we check that the electric range and dryer have proper 4-prong outlets (with separate ground) if they’re modern – older ones sometimes still use 3-prong, which means the appliance isn’t separately grounded (we’d suggest updating that). For the HVAC units or water heater, we look at the disconnects and wiring size, check if any signs of overheating or arcing there.
- Report and Recommendations: After the inspection, I provide a report of findings. It will list any safety hazards (e.g., “Double tapped breaker feeding kitchen and dining – recommend adding separate circuit”), any code violations (especially if this is for a home sale, the buyer may request fixes for code issues), and upgrade suggestions. Common recommendations include: upgrading the service panel if it’s old, adding GFCIs in bathrooms/kitchen/garage/outdoors if not present, replacing any damaged wiring sections, adding more circuits to alleviate overloads, updating ungrounded outlets, and so on.
You as the homeowner should expect a bit of Q&A with the electrician too – we’ll ask if you’ve noticed any problems (maybe you mention “the lights in the living room flicker when the AC kicks on” or “this outlet sometimes doesn’t work”). Those clues help target our inspection. We might test the circuits in question with an amp clamp (to see if something’s drawing too much) or further open devices to find the cause.
Time-wise, a full inspection can take a couple of hours depending on house size and complexity. But it’s time well spent. As highlighted by a professional service description, an electrical inspection will check wiring, outlets, switches, and breakers for wear or code issues, catching problems early to prevent hazards.
Afterwards, you’ll have a good understanding of your home’s electrical health. Maybe everything is fine (great!), or maybe there’s a list of repairs/upgrades to plan out. If significant issues are found, I’ll prioritize them for you (highest risk vs. improvements that aren’t urgent).
For example, I might say: “Top priority is to replace those two scorched outlets we found and install GFCIs in the bathroom and kitchen. After that, in the next year or so, consider upgrading the service panel because it’s almost at capacity and it’s one of the older unsafe models.” This gives you a roadmap.
In summary, expect the inspector to be thorough – checking the major components (panel, wiring, outlets) and the safety devices (grounds, GFCIs, smoke alarms). Don’t hesitate to ask questions during or after the process; a good electrician will be happy to explain what they’re looking at and any concerns. The end result is peace of mind and knowledge of any electrical issues in your home so you can address them proactively.
Chapter 7: Choosing a Qualified Electrician (Credentials & Experience)
Q20. Are you licensed and insured to perform residential electrical work in my area?
Yes – I am a fully licensed and insured electrical contractor, qualified to perform residential (and commercial) electrical work in the state of Oklahoma and specifically here in the Tulsa area. This is one of the first questions any homeowner should ask a prospective electrician, and I’m happy to provide the details:
- Licensing: I hold an Oklahoma State Electrical Contractor’s license (and I’m a Master Electrician as well). This means I have met all the state’s requirements for electrical knowledge and practice, including years of on-the-job experience and passing the state exams for journeyman and then master electrician. It also means I’m legally permitted to do electrical work in your home, pull permits, and have my work inspected. In our area, electricians must be licensed to ensure they understand the electrical code and safety practices. Hiring an unlicensed person is risky and often against the law for anything beyond very minor work. A license is proof that an electrician has met the minimum competency and safety standards set by the licensing board.Specifically, TL Davis Electric & Design (my company) holds an Electrical Contractor’s license, and I (Terry Davis) hold a Master Electrician license. These credentials can be verified with the Oklahoma Construction Industries Board or relevant local authority. I can provide you my license number and you’re free to check it – and I encourage customers to verify any contractor’s license if they have doubts. A professional won’t mind at all – in fact, we’re proud of our credentials.
- Insurance: My company carries both liability insurance and workers’ compensation insurance (for any employees). Liability insurance (I carry at least the industry standard $1 million policy) protects your home in the unlikely event we cause any damage or accident during the job. For example, if an electrician accidentally were to start a fire or flood (maybe by hitting a pipe) while working, the insurance covers the cost of repairs. It’s peace of mind for you (and for me). Workers’ comp covers any injuries that might happen to me or my team on your property, so you as the homeowner are not liable for those medical costs.A reputable electrician will gladly provide proof of insurance if asked – I can provide a certificate of insurance when we sign a contract if you want. Having proper insurance is a sign of a responsible contractor; it ensures that if an accident occurs, you’re not going to be stuck with the bill.
- Local Licensing/Permits: Besides state licensing, many cities (including Tulsa and surrounding communities like Broken Arrow, Owasso, etc.) require that electricians register or have a city license to pull permits there. I’m registered in the cities I work in regularly. This means I can handle all the necessary permits and inspections for your job. You won’t be asked to handle any paperwork – I’ll take care of it, ensuring everything is up to code and approved by inspectors (we’ll get more into permits in a later question, but know that being licensed is a prerequisite to even pulling a permit legally).
Why is licensing and insurance so important? Because it protects you. A license shows that the electrician has proven their knowledge of the National Electrical Code and local amendments, and has practical experience. It also typically means they must complete continuing education to stay up to date on code changes (I do yearly training to keep my license current). Insurance means if something goes wrong, you’re not left holding the bag. If an unlicensed, uninsured person were to get hurt on your property or screw up the wiring causing a fire, it could become a nightmare of liability and damage.
So, to directly answer: Yes, I am licensed and insured in your area. I can provide documentation of my electrical contractor’s license and certificate of insurance upon request. In fact, any professional electrician should have no problem providing these before starting work. Don’t hesitate to ask – it’s a standard and important question. I want you to feel as comfortable as possible when hiring me, knowing that you’re dealing with a legitimate professional who operates above-board. Your home’s electrical system is not something to trust to an unqualified person.
Q21. How many years of experience do you have with residential electrical issues?
I have over 20 years of experience working as an electrician, with the majority of that time focused on residential electrical work. To break that down: I started as an electrical apprentice in my late teens, became a licensed Journeyman after the required four years of on-the-job training and classroom instruction, and then achieved my Master Electrician license. Eventually, I founded TL Davis Electric & Design, and I’ve been serving homeowners in the Tulsa area ever since.
In those two decades, I’ve pretty much seen it all when it comes to residential electrical issues. I’ve worked in hundreds of homes – from new constructions where we wire the entire house from scratch, to century-old houses in Tulsa’s historic neighborhoods where we carefully update antique wiring systems. Because of this breadth of experience, there’s a good chance I’ve encountered and solved whatever electrical problem you’re dealing with:
- Troubleshooting Expertise: With my years in the field, I’ve developed a strong intuition for diagnosing tricky electrical issues. For instance, I can often pinpoint why a particular circuit is intermittently losing power or why lights might be flickering by drawing on similar past cases. Experience is huge in troubleshooting – textbooks can’t teach the odd quirks you learn on the job. So when a homeowner says “my outlet sometimes works and sometimes doesn’t,” I might recall a similar call where it turned out to be a loose neutral in another outlet on the circuit, and check there first. Indeed, having years under my belt means I can troubleshoot efficiently and accurately, saving you time and money.
- Specific Residential Projects: I’ve installed countless lighting fixtures, ceiling fans, outlet receptacles, switches, and appliance hookups. I’ve upgraded many services and panels (taking old 60A or 100A services to 200A modern standards). I’ve run circuits for everything from hot tubs and pool equipment to home offices and theater systems. Because I also do design consulting, I have experience with the aesthetic side too – like laying out lighting for a kitchen remodel or specifying under-cabinet lighting solutions, etc. But at the core, I’m a hands-on electrician, and I’ve physically worked on residential electrical systems day in and day out for 20+ years.
- Familiarity with Local Homes: I’ve worked in the types of homes in Bixby, Broken Arrow, Owasso, Sand Springs, and of course Tulsa proper, so I’m familiar with the common wiring methods and issues in this region. For example, many mid-century homes around here used aluminum wiring or have fused subpanels; I’ve addressed those. Some areas have lots of pier-and-beam foundation homes where crawl space wiring can get messy – been there. New suburban homes might have builder-grade devices that need an upgrade; done that too. This local experience means I’m prepared for the typical scenarios that come with each era and style of house in our area.
- Continuous Learning: While I have 20+ years of experience, I’m also continually educating myself on new technologies and code changes. The electrical trade evolves – with new codes every three years, new smart home systems, solar and battery systems, electric vehicles, etc. My deep experience provides a foundation, and my ongoing learning ensures I can tackle even the newest residential electrical projects.
Why does experience matter? Because you want someone who has proven their skills over time and in varied situations. Electrical work in residences can sometimes present unexpected challenges (like opening a wall and finding a jumble of old splices). Having been through so many scenarios, I’m rarely surprised or stumped. An experienced electrician also works more efficiently – I know the best practices and tricks of the trade that come only from doing it many times. Plus, with experience comes a safety mindset; I’ve worked so long without major incidents because I follow safe procedures learned over years.
If you prefer specifics: As Terry Davis, I’ve been a Master Electrician for over a decade, and prior to that a journeyman. TL Davis Electric & Design has been in business for 15 years serving the community. We’ve earned a lot of repeat clients and referrals, which I believe is due to our experience and quality of work. I can even provide references (see next question) who can attest to the work we’ve done over the years.
In summary, I bring a wealth of residential electrical experience to the table – decades of hands-on problem-solving and installation. When you hire me, you’re getting more than just theoretical knowledge; you’re getting an electrician who has honed his craft in real Oklahoma homes just like yours, likely solving issues very similar to what you need addressed.
Q22. Do you have recommendations or references from other homeowners?
Yes, absolutely. I take pride in my customers’ satisfaction, and I’m more than willing to provide references from homeowners I’ve worked for. In fact, many of my new clients come through word-of-mouth referrals. I can supply you with a list of previous customers (with their permission) who have agreed to share their experience about the work I’ve done. Additionally, you can find online reviews and testimonials for TL Davis Electric & Design on our website, on Google, and on social media.
Here’s how I typically handle references and recommendations:
- Direct References: Upon request, I can give you contact information for a few recent clients or projects similar to yours. For example, if I’m bidding on a big job like a whole-house rewire or panel upgrade for you, I can connect you with a homeowner in [perhaps Owasso or Broken Arrow] who had a similar rewire last year. They can speak to the quality of work, professionalism, and results. I usually have a couple who’ve volunteered to be references because they were particularly pleased with the work. Talking to past customers is one of the best ways to gauge an electrician’s reliability and quality, so I encourage it. A reputable electrician welcomes this step.
- Portfolio and Testimonials: I maintain a portfolio of sorts – photos of some jobs (with client permission), and written testimonials. On my website and brochure materials, you’ll find quotes from homeowners saying things like “Terry was prompt, solved an issue that had stumped others, and left the workspace clean – highly recommend!” (Those are actual sentiments I’ve received). There’s also star-rating reviews on Google Business and perhaps on Nextdoor or other local forums. I’m proud to say we have many 5-star reviews highlighting things like our fair pricing and neat work.
- Community Reputation: Being a local electrician for 20+ years, I’ve built a good reputation. You might find that if you ask around (neighbors, or a community Facebook page), someone has heard of or used TL Davis Electric. I often get called because, for example, a neighbor on the street had me do a service upgrade and they recommended me to the whole block for any electrical needs. In essence, my business has grown on trust and recommendations. I can point you to resources like the Better Business Bureau listing or any awards (some local publications do “Best of” lists and I’ve been listed among top electricians).
- Proof of Past Work: In some cases, beyond references, I can show you artifacts like permit sign-offs or inspection reports from past projects, which demonstrate that my work passes code and inspections (not that you likely doubt that, but it’s part of establishing credibility). Also, I have relationships with general contractors and other tradespeople in the area who refer me as their go-to electrician; their willingness to keep recommending me is another reference point.
When you contact a reference I provide, I’m confident you’ll hear positive feedback. Clients often mention that I explain things clearly, don’t upsell unnecessary work, stick to the estimated price, and show respect for their home (like wearing boot covers, cleaning up, etc.). They might share an anecdote of how I went above and beyond – like fitting them into the schedule quickly when they had an urgent issue, or solving a long-standing electrical mystery in the house.
I know hiring an electrician is about trust – we’re dealing with your home and family’s safety. So I want you to be as comfortable as possible. Checking references is a smart step. As one guideline suggests, a dependable contractor should have a track record of satisfied clients and be willing to share references. I fully embrace that philosophy.
Feel free to ask for as many references as you need. I can provide a mix – maybe someone for whom I did a small job (like troubleshooting a circuit), someone for a major remodel, and someone long-term who uses me for rental properties or multiple projects, so you get a well-rounded sense. Also, feel free to check out our online presence where you can read reviews straight from homeowners – that transparency is important.
In short, yes, I have plenty of recommendations from homeowners, and I encourage you to reach out to them or read their reviews. Hearing from other customers will give you confidence in what it’s like to work with me – reliability, quality, and professionalism are themes I believe will come through from those references.
Q23. Do you specialize in the type of electrical work I need?
I specialize in residential electrical work, which covers a broad range of services that most homeowners need. My expertise includes everything from troubleshooting and repairs of existing wiring to installations and upgrades like panel changes, lighting design, adding circuits, remodeling projects, and more. If you have a specific type of project or issue, chances are I have considerable experience with it. Let me outline a few areas of specialization within residential electrical work that I focus on:
- Troubleshooting and Repairs: I excel at diagnosing weird electrical problems (flickering lights, partial power loss, tripping breakers, etc.) and repairing them. This is a daily part of my work, and over the years I’ve developed a knack for it. So if your need is to figure out why something isn’t working right and fix it, that’s in my wheelhouse.
- Electrical Service Upgrades and Panel Work: As mentioned earlier, I do a lot of panel upgrades (like from fuses to breakers, or 100A to 200A conversions) and heavy-ups. I’m very comfortable dealing with the utility coordination, permits, and the heavy-duty wiring involved. If you’re getting a new central AC or an EV charger and need more capacity, that’s a project I handle frequently. By specializing in this, I keep up with code requirements for services and have the right equipment to do them efficiently.
- Residential Remodeling and Additions: I frequently work with homeowners (and general contractors) on kitchen remodels, bathroom upgrades, room additions, finishing basements etc. This involves installing new circuits for appliances, lighting layouts, receptacle placements, etc., all per the latest code (AFCI/GFCI requirements, spacing rules, etc.). If you’re renovating, I can both design and install the electrical system to meet your needs and code. Not every electrician loves the fiddly work of residential remodeling (cutting in boxes in finished walls, fishing wires, matching old work to new) – but I actually enjoy it and have gotten quite proficient. That’s a specialty of mine.
- Lighting Design and Installation: I have a strong background in lighting – both the technical and aesthetic sides. I can help you choose and install recessed lighting, under-cabinet lights, landscape lighting, smart lighting systems, and more. Proper lighting can transform a home, and I stay updated on the latest LED fixtures, smart dimmers, and control systems. If you want to modernize your home’s lighting, I definitely specialize in that. In fact, the “Design” in my company name comes from the design consulting I offer for lighting and electrical layout.
- Home Safety Upgrades: I also put a focus on safety upgrades like installing GFCI outlets, AFCI breakers, whole-house surge protectors, smoke/CO detectors, and backup generators or transfer switches. These are areas I recommend to a lot of homeowners and have done many times. If your project is safety-oriented, like rewiring parts of the house to eliminate aluminum or adding protection devices, that’s well within my specialty.
- Specialty Installations: Some homeowners have unique needs like installing a Tesla/EV charging station in the garage, hooking up a hot tub or sauna, or wiring a workshop or hobby kiln – I’ve done all of those. So if your project is something slightly out of the ordinary, I likely have done similar and can call it part of my specialization in “making things work for how you live.”
I tailor my approach depending on if the house is old or new, understanding the differences in wiring systems (e.g., I’m comfortable working with old cloth-insulated wires or running new conduit where needed in historic homes without damaging aesthetics). I consider my specialty to be quality residential service – meaning I’m not just an installer, I’m a consultant and a problem-solver for homeowners.
Now, if you have a very specific niche project – say, you have a large home automation system or want a solar array integrated – I have working knowledge and can do the electrical side, but I might coordinate with specialists in solar or low-voltage AV for optimal results. I’m upfront about what I do in-house vs. when I’d bring in or recommend someone with a narrow specialization.
However, 99% of typical home electrical work, I handle directly as it is my specialty. As an example, one homeowner asked if I was familiar with knob-and-tube wiring because they wanted part of their old house reworked – I was able to assure them I’ve specialized in safe transition methods for knob-and-tube (like installing junction boxes to splice to new NM cable, ensuring everything remains accessible and up to code) and I had done several such retrofits. Another asked if I could install and program their new Wi-Fi smart dimmers everywhere – yes, I’ve installed many and can get them working with Alexa or Google Home, etc.
To connect with the outline: Hiring someone with specific experience ensures they understand your particular electrical projects’ requirements. I agree. If you told me what you need, I’d be able to share examples of similar work I’ve done, reinforcing that it’s a specialty of mine. I won’t take on a job that is outside my competence. But residential electrical is what I do day in and day out – it’s my bread and butter – so you’re in good hands.
In summary, yes, I specialize in residential electrical work, including the specific type of work you likely need. Whether it’s a small repair or a big installation, I have the focused experience to do it correctly and efficiently. I’m always happy to discuss your particular project in detail to ensure my expertise aligns perfectly with what you’re looking for.
Chapter 8: Estimates, Pricing, and Contracts
Q24. Will I receive a detailed written estimate before work begins?
Yes, absolutely. I provide a detailed written estimate for all projects, big or small, before any work commences. It’s important to me that you understand exactly what work will be done and how much it will cost, with no surprises. Here’s what you can expect regarding the estimate process:
- On-Site Evaluation: First, I’ll typically come out to your home (for free, for an estimate visit) to evaluate the work. We’ll discuss what you want done, I’ll examine the existing electrical setup, and we’ll go over options if applicable. This ensures I’ve accounted for all details and can give an accurate quote.
- Written Estimate Document: Following that, I will prepare a written estimate outlining the scope of work and pricing. This could be a formal proposal document or email, but it will be in writing (not just a verbal ballpark). The estimate will itemize the major components of the job. For example, it might say:
- “Replace 100A breaker panel with new 200A panel, including new service mast and meter can” – followed by a price for that portion.
- “Install 6 new LED recessed lights in living room with dimmer switch” – a price for that.
- “Repair and secure loose outlet in kitchen and replace with GFCI outlet” – another line item.
I believe in transparency, so I try to break down labor and materials for larger jobs if it’s helpful, or at least break the job into components. This way you can see what you’re paying for each aspect. If something is optional or an upgrade, I might list it as such to give you a choice.
- Materials, Labor, Permits Clearly Listed: The estimate will clearly state that it includes materials, labor, and any permit fees (if needed). I don’t like hidden fees. If a permit is required, I’ll note whether the cost for that and the inspection is included in the estimate. Typically, my quotes are turnkey – meaning one price covers everything needed to complete the job and leave it in working order. For instance, “Total cost includes all parts, wire, devices, permit, and cleanup”. If there are any exclusions (rare – maybe if we anticipate drywall repair by others), that would be noted too.
- Detailed and Professional Format: I use either a printed form or a PDF from our software that has my company info, license number, your name/address, the date, and a breakdown of services with costs and a total. It will have terms and conditions (like how long the estimate is valid – usually 30 days, payment terms, etc.). Essentially, it doubles as a contract once you sign off or accept it, ensuring we’re on the same page. According to best practices, never start work without a written estimate/contract, so I make sure to follow that.
- No Obligation and No Pressure: Providing the estimate is free and you’re not obligated until you decide to proceed. I encourage questions about the estimate. If anything is unclear, I’ll gladly explain how I arrived at the cost. For example, maybe you see “Install 3 dedicated circuits – $X” and wonder why that amount; I can break it down to include X feet of cable, Y hours of labor, new breakers, etc., if you’re curious. I want you to be comfortable that it’s a fair price for the work described.
- Honoring the Estimate: Once I give you a written estimate and you accept it, that’s the price you’ll pay, barring any unforeseen circumstances that we couldn’t predict (which are rare in residential electrical with a proper initial look). If during the job you ask for additional work, we’d of course discuss a change in cost before proceeding with that. But I won’t hit you with surprise extra charges for something included in the original scope. My detailed estimates aim to foresee the typical issues. For instance, if I suspect the panel replacement might reveal short wire lengths requiring junction boxes, I’ll include that scenario in the scope so it’s covered. Basically, I strive to avoid any ambiguity about cost upfront (and customers appreciate that).
Having a detailed written estimate protects both of us: you know what you’re getting for the price, and I know what’s expected. It’s also something you can compare if you’re getting multiple quotes from different electricians (which I understand and encourage you to do to feel confident in your choice). I believe you’ll find my quote competitive and comprehensive.
In summary, yes, you will receive a detailed written estimate before work begins, outlining labor, materials, permits, etc., so you can give informed approval. I never begin work without the homeowner having that in hand and agreeing to it, because clarity up front makes for a smooth project and a good working relationship.
Q25. How do you handle pricing? Is it a flat rate or hourly?
I handle pricing in a way that best fits the job and is fairest to you. In many cases, I use flat-rate pricing for defined tasks, but I also track things on an hourly basis behind the scenes to ensure fairness. Let me clarify:
- Flat Rate for Common Tasks: For many standard jobs (installing an outlet, replacing a fan, upgrading a panel, etc.), I will quote you a flat rate in the estimate. That means the price is fixed for the described scope of work, regardless of whether it takes me a bit longer or shorter than expected. I do this to give you cost certainty. For example, if I quote $200 to install a new dedicated 20A outlet for a microwave, and I end up taking two extra hours fishing the wire because of an unexpected hurdle, that’s on me – you still pay $200. Flat-rate pricing is based on an estimated labor time plus materials, but once I give it to you, it doesn’t change even with minor fluctuations in actual labor. Homeowners generally prefer this because they know exactly what the bill will be.
- Hourly Rate for Indeterminate Work: There are some cases where the scope is a bit open-ended or investigative. For instance, troubleshooting an unknown electrical issue: I might not know if it will take 30 minutes or 3 hours to find and fix the problem. In such cases, I will communicate that the work will be billed at my hourly rate (I’ll tell you the rate in advance, of course) and maybe give a rough expected range. However, even in those cases, I tend to give a “not-to-exceed” estimate or update you as we go. For example, “I’ll troubleshoot at $X/hour; most of these issues are found within 2 hours. If I hit 2 hours and haven’t solved it, I’ll check in with you and discuss next steps.” This way you’re not surprised. I try to avoid entirely open-ended hourly scenarios – customers understandably get nervous about a “blank check” feeling. Communication is key.
- Hybrid Approach: Sometimes I’ll use a mix. Suppose you want a bunch of small fixes around the house: a few outlets changed, a switch fixed, some light fixtures swapped. Instead of tallying each tiny item, I might estimate it’ll all take about 4 hours and give a flat bundle price (which inherently is hourly-based under the hood). But again, I’d present it as one flat project cost so you’re not counting hours.
- Transparency in Pricing: Whether it’s flat or hourly, I’m transparent. If flat, I’ll show what’s included (so you know if any extra requests would be extra). If hourly, I’ll keep you informed of the time and cost as we progress, and certainly not exceed any ballpark I gave without your approval. My goal is no surprises on the invoice.
- No Hidden Fees: I don’t charge things like “trip fee” or “fuel surcharge” beyond what’s built into my pricing, and I don’t mark up beyond what’s in the estimate. For hourly jobs, I don’t pad hours – you get honest labor for honest pay. I usually have a minimum charge (like one hour) for small jobs to cover going out there, but once that’s met, it’s by the quarter-hour or so, fairly.
- Payment and Invoicing: For flat rate work, the estimate shows the flat amount and that’s what you pay upon completion (or sometimes a deposit portion up front for large jobs, which would be stated). For hourly service calls, I’ll present an invoice showing hours worked, the rate, and any materials used (often with material costs listed). That way you see exactly how the price came about.
In summary, I strive to use flat-rate pricing whenever possible because it gives you clear, up-front pricing. If a job doesn’t lend itself to a flat quote, I’ll explain that it will be time-based and keep you updated. My overall approach to pricing is honesty and fairness – I want you to feel that you got quality work at a reasonable price, with no billing surprises. If you ever have a question about how I arrived at a price, I’ll happily break it down for you.
Most of my customers appreciate that I stick to my quotes (flat rate) and don’t nickel-and-dime. As a reference, some electricians do everything strictly hourly, but I find homeowners prefer knowing the cost beforehand. That’s why my written estimates (as discussed in Q24) detail the price structure clearly, whether flat or hourly, and I adhere to that.
Q26. Do estimates include parts, labor, and permit costs?
Yes, my estimates are generally all-inclusive, covering labor, materials/parts, and any required permit/inspection fees for the job. I believe in providing a comprehensive quote so you don’t have to guess about add-on costs. Here’s how I handle each component:
- Labor: The cost of labor (my time and any crew if I have helpers on the job) is built into the quoted price. If it’s a flat-rate quote, it was calculated based on the labor effort required. If it’s hourly, obviously it’s directly tied to labor hours at the stated rate. Either way, the estimate document will not list labor separately in most cases (unless for larger projects I break it down), but you can be assured the price given includes the necessary labor to complete the work described.
- Parts/Materials: All standard materials needed to do the job are included in the estimated price. This includes things like wiring, outlet boxes, receptacles or switches, breakers, conduit, fittings, etc. For example, if I quote you to install six recessed lights, that price includes the light cans, LED trims, the wiring, switch, dimmer, and so forth – everything needed to deliver a functioning set of lights. I won’t charge extra for incidental supplies either (tape, wire nuts, etc. are just part of doing business). If there are unusually expensive specialty items required, we’d have discussed that and they’d either be included or explicitly noted. But typically I source quality materials as part of the job and that cost is folded in. My estimate write-up might say “including all materials” explicitly, or it might list certain major components; regardless, unless something is clearly excluded, assume it’s included.
- Permit Fees: If a city or county permit is required (for example, for a panel upgrade or a significant wiring addition), I will include the permit cost in the estimate. I’ll handle pulling the permit and coordinating the inspection as part of the service. The estimate/contract will often state “all work will be completed to code and includes permit and inspection,” and the price reflects that. I know roughly what permits cost locally (e.g., a residential electrical permit in Tulsa might be $X), so I factor that in. You won’t be asked to pay the permit office separately; I take care of it and just include it in our contract price. After the job, I’ll give you any pertinent paperwork like the final inspection approval for your records.
- What’s Not Included: If there’s something not included, I will make it very clear. For instance, electricians typically don’t do drywall patching/painting. So if I have to cut an access hole, my estimate would note “drywall repair by others” or I’d discuss that with you (sometimes I can arrange a drywall guy, but that’d be spelled out and either included as a separate line or excluded). But general rule: if it’s an electrical part of the job, it’s included. Debris cleanup and hauling is also included – I’m not going to charge extra to dispose of the old panel or sweep up.
- Detailed Contract Terms: In the detailed estimate/contract, you might see a line like, “Price includes all materials and labor for the above scope. Any additional work or unforeseen conditions will be discussed and approved in writing before extra charges.” This ensures we both understand what’s covered. If a permit is pulled, typically I also guarantee that the work will pass inspection – if for some odd reason an inspector required something additional minor that wasn’t originally planned, I handle that at no extra cost because the aim is a compliant job as promised.
So, when you receive my estimate, you can be confident that the number at the bottom is the number you’ll pay for the described job, with parts, labor, permits all rolled in. There won’t be later add-ons like “oh, plus $X for materials” or “you need to pay the city separately.” The clarity and simplicity of an all-in price is something clients appreciate.
I recall one client asking explicitly, “Does this include everything? Do I need to buy the light fixtures myself?” and I clarified that my price included a standard selection of fixtures and I’d show them options to choose from, etc. If a client has already purchased fixtures they want me to install, I can adjust the estimate to remove the cost of those parts. But normally, I supply reliable parts and that’s part of the package.
In summary, yes, my estimates include parts, labor, and permits to complete the work described. I want you to know the full investment up front, with no hidden or missing pieces.
Q27. What payment options do you offer?
I try to be flexible with payment options to make it convenient for homeowners. The payment methods and terms we can accommodate include:
- Cash or Check: Traditional and often preferred by many. You can pay by personal check or cash once the work is completed (or for larger jobs, according to the draw schedule we agree on). I’ll provide a receipt for any cash received. Checks can be made out to TL Davis Electric & Design. Many clients still like checks because they provide a record, and there’s often no extra processing fee, unlike with cards.
- Credit/Debit Cards: Yes, I can accept major credit cards (Visa, MasterCard, possibly Amex and Discover) via a mobile card reader or invoicing system. Some homeowners prefer to put projects on a card for points or cash-back, which is completely fine. I use a secure payment processor (such as Square or QuickBooks Payments), so your card information is handled securely. If I do incur a fee for the card, I typically absorb it as a cost of doing business for standard jobs; if it’s a very large amount and there’s a significant processing fee, I might discuss a slight convenience fee or offer a small discount for check to save those fees. But generally, no issue – we accept cards.
- Online Payments: If you prefer electronic payment, I can do bank transfers or services like PayPal/Zelle in some cases. For example, some clients pay through our QuickBooks invoice which allows ACH bank transfer – this is essentially an electronic check and usually free of charge. Zelle is another easy way (direct bank-to-bank). I try to accommodate whatever’s easiest for you and secure.
- Receipts and Documentation: Whatever method you pay with, I will provide a receipt or paid invoice for your records. This is important especially if you ever need proof of the upgrade for insurance or resale purposes (e.g., showing that you upgraded the electrical panel with a licensed contractor – the paid invoice and permit sign-off serve as proof).
I strive to be accommodating because each homeowner may have different preferences. Some older clients are only comfortable with a check; some younger clients prefer everything digital via a card or app – I’m fine either way. My primary concern is that payments are handled securely and on agreed terms.
Also, I do not typically offer in-house long-term financing like a big store might (no “12-month payment plan” internally), but as mentioned, many folks use their credit cards for that. If someone truly had a hardship with a necessary repair, I’d discuss what we could do, but that’s on a case-by-case, compassionate basis.
In summary, I offer multiple payment options: cash, check, credit card, and electronic payments, and I’m transparent about deposit and final payment schedules. We’ll agree on the payment terms when you accept the estimate, so everything is clear. Ultimately, I want the transaction to be as easy as possible, so you’ll find me quite flexible in how you can pay.
Chapter 9: Permits and Code Compliance
Q28. Will you handle all permits and inspections required by local codes?
Yes, definitely. I take care of obtaining any necessary permits and scheduling inspections for the electrical work I perform, so you don’t have to worry about that. Navigating permits and code compliance is part of my job as a licensed contractor, and I handle it start to finish:
- Determining Permit Needs: First, I know which types of jobs require a permit in our area. Generally, anything beyond simple like-for-like repairs (e.g., swapping a light fixture) often does need a permit – especially service upgrades, new circuit installations, remodel rough-in work, etc. I err on the side of safety and compliance, so if in doubt, I’ll suggest pulling a permit. It’s ultimately to protect you as the homeowner, ensuring the work gets an official thumbs-up and is on record.
- Permit Application: I will fill out the permit application with the city or county building department (as a licensed contractor, I’m authorized to do so). I’ll use my license credentials and describe the scope of work. For example, “Replace 100A panel with 200A panel upgrade, refeed existing circuits” or “Wiring for kitchen remodel – adding circuits for appliances, lighting, per NEC 2023”. I pay the permit fee (which, as we discussed in Q26, is included in my price). Many municipalities allow contractors to pull permits online; I do that whenever possible to expedite the process.
- Scheduling Inspections: Once the work is underway or completed (depending on the type of inspection needed – sometimes there’s a rough-in inspection before drywall, then a final after completion), I will schedule the inspection with the local inspector’s office. I coordinate this to minimize inconvenience to you. I always aim to be on site for the inspection, to answer any of the inspector’s questions and address anything on the spot if needed. Having me present also means you typically don’t have to interact with the inspector aside from maybe a greeting – I handle it.
- Inspection Assurance: I take great pride in my work passing inspection the first time almost always. I know the current electrical codes and local amendments well. I perform the installation to meet or exceed those codes. So when the inspector comes, I expect a quick approval. If the inspector does point out something (maybe a local nuance or just a small fix), I will correct it promptly at no additional charge. Essentially, I ensure the work meets code and will get approved. You will not be left with an open or failed inspection. I also handle the paperwork of getting the final inspection record.
- Final Documentation: After passing, I can provide you evidence of the inspection approval (usually a sticker on the panel or a signed card, plus it’s in city records). This is good to keep for insurance or future resale – it proves the electrical work was done with permit and passed, which often is a question on home sale disclosures.
- Why This Matters: Homeowners sometimes ask, “Do we really need a permit?” I always advocate yes where required, because unpermitted work can cause issues later (home insurance might not cover an electrical fire if work was unpermitted, or when selling the home you might have to scramble to get things inspected or risk a deal falling through). As your electrician, I remove that worry by doing it right and legal. And since I handle it all, it’s not a hassle for you.
There have been instances where I discovered previous work in a home that wasn’t permitted and wasn’t up to code. In those cases, if I’m modifying or tying into it, I’ll correct it and mention that to the inspector too. My goal is to leave the whole system safer and code-compliant. Inspectors in our area know me and know that I do solid work – this often makes the process smoother and quicker, because there’s a level of trust built. But regardless, every inspection is a welcome chance to have a second set of eyes confirm safety.
So yes, from the moment you hire me, I will handle the permit application, any necessary plan submissions, meet the inspector, and ensure a pass. You won’t have to fill out forms or take time off work to meet inspectors – that’s part of the service I provide as a licensed pro. All of this will be indicated in our contract or discussed beforehand so you know the timeline (e.g., “We’ll do the rough-in Tuesday, the inspector comes Wednesday, then we close up walls and finish Thursday after approval” – that kind of communication).
In summary, I will handle all permits and inspections required for the job, ensuring everything is up to code and officially approved. You can rest assured the work will be done the right way and appropriately documented with the local authorities.
Q29. How do you ensure your work meets current electrical codes and standards?
Ensuring that all work meets or exceeds current electrical codes and standards is a core part of my professional responsibility. Here are the ways I make sure everything I do is code-compliant and safe:
- Up-to-Date Knowledge: I stay current with the National Electrical Code (NEC) updates and any local amendments. The NEC is updated every three years (2020, 2023 editions, etc.), and Oklahoma (and local jurisdictions) typically adopts those codes with some modifications. I regularly attend continuing education courses – in fact, maintaining my Master Electrician license requires me to complete continuing ed, which focuses on code changes and best practices. For instance, when AFCI requirements expanded or when GFCI rules changed to include laundry areas, I made sure to integrate those into my work practices immediately. Also, I engage with professional forums and trade publications to keep sharp on code interpretations and new technologies.
- Workmanship Aligned with Code: During the installation, I constantly reference the applicable code rules. For example, I ensure cables are properly stapled and supported, box fill limits are not exceeded (to avoid overstuffing a junction box), circuits are correctly sized to breakers, neutral and ground conductors are separated where required (like in subpanels), and so on. If I run a new receptacle circuit in a living room, I know it must be AFCI protected (code requirement), and I will do so by using an AFCI breaker or outlet. If I wire a bathroom, I know I need a 20A dedicated circuit and GFCI protection. These are second nature due to experience and training, but I don’t get lazy about them – I consciously follow the rules on every job, even small ones. I also use quality materials that meet UL standards.
- Checklists and Testing: I effectively have a mental (and sometimes written) checklist for code-compliance points. For example, after finishing a job, I’ll test the GFCI outlets to make sure they trip properly, test three-way switches to ensure they function, use a circuit analyzer to verify no open grounds or reversed polarity on outlets, etc. That way, I ensure not just code compliance, but proper functionality. If something doesn’t test right, I fix it before calling it done. Also, I double-check things like smoke detectors are interconnected if required, dedicated circuits aren’t inadvertently tied together, arc-faults reset correctly, and so forth.
- Use of Code Resources: I keep a NEC codebook or quick reference guide in my work van. Sometimes a unique situation arises where I want to verify a specific code article. For instance, if I’m installing recessed lights in insulation, I recall they must be IC-rated, etc., but if an inspector or I have a question, I’ll refer to the book. There’s no shame in looking it up – codes can be complex, and ensuring accuracy is key. Additionally, I often reference manufacturer’s instructions (which are part of code by reference). For example, the NEC says install equipment per manufacturer’s instructions – I always read those for devices like panels, EV chargers, etc., to make sure I’m doing it right.
- Planning and Permit Process: On larger projects, sometimes we have to submit a basic plan or description for the permit. In doing so, I plan according to code (like how many circuits, what amperage, load calculations, etc.). For service upgrades, I do load calculations per NEC Article 220 to confirm the service size is adequate. This upfront planning using code methodology ensures that by design the work will meet standards.
- Peer and Inspector Interaction: Over years, I’ve built relationships with local electrical inspectors. I actually welcome their insight – if an inspector mentions a better way or a particular local interpretation, I incorporate that going forward. It’s a continuous improvement loop. Being on good terms with inspectors (through consistent quality work) also means they trust my jobs, but I never use that as an excuse to cut corners – rather, it motivates me to maintain that trust by always following code diligently.
- Quality Over Minimum: While code is the minimum standard, I often go a bit beyond. For example, code might allow a certain practice, but if I know a superior method, I’ll do that. An example: Code might allow shared neutrals on multi-wire branch circuits with handle-tied breakers; I usually prefer to put those on a two-pole breaker to ensure simultaneous trip – it’s code compliant either way if tied, but the two-pole is a touch safer to me. Another: The code might technically allow pushing the capacity of a circuit to 80% continuous load; I often design with more headroom. These small choices mean not only do I meet code, but I provide a margin of safety and future-proofing.
So when I answer this question for a customer: I explain that I’m meticulous about following the latest electrical codes and best practices. I’ll mention my licensing and continuing education (to assure them I’m up-to-date). I might give a simple example – like: “By code, all the kitchen countertop outlets we’ll install need GFCI protection and to be on two 20A circuits; we will absolutely do that. Also the code now requires tamper-resistant outlets, so all new receptacles I install will be the child-safe tamper-resistant type – that’s standard for me.” This demonstrates concretely how I adhere to code.
In summary, I ensure my work meets current codes by staying educated, planning accordingly, executing with care, and double-checking against code requirements. All work will be permitted and inspected as discussed, which is a final verification of compliance. You can rest easy knowing the electrical work in your home is safe, legal, and meets the highest standards.
Chapter 10: Warranties, Follow-Up, and Safety Protocols
Q30. Do you offer warranties on labor and parts?
Yes, I certainly do. I stand behind the quality of my work and the materials I use, so I offer a warranty on both labor and parts for a defined period after the job. Here are the details of my warranty:
- Labor Warranty: I typically provide at least a 1-year warranty on my workmanship (labor). This means that if any issue arises from the way something was installed – say a connection I made comes loose, or a circuit I wired isn’t functioning properly due to an installation error – I will come back and fix it at no cost to you during that warranty period. Frankly, it’s rare that issues come up, but it’s important for you to know that I’ll take care of it if they do. Some companies even advertise longer labor warranties (like 2 or 5 years); I’ve found one year covers a full cycle of seasons and usage which is enough to shake out any workmanship issues. That said, I’m not going to be rigid – if you had a problem at 13 months that clearly was due to my work, I would still address it as a professional courtesy. My goal is your long-term satisfaction, which earns me referrals and repeat business.
- Parts/Materials Warranty: The materials and devices I supply (outlets, breakers, lights, etc.) come with manufacturer warranties – often these are 1 year, some longer (for instance, many LED fixtures have 5-year or even 10-year limited warranties). I pass those manufacturer warranties on to you. Practically, this means if a part I provided fails within a reasonable time, I will replace it. For example, if an LED recessed light I installed dies after 8 months, I’ll get a new one (should be under manufacturer warranty) and install it without charge to you. If something fails outside of warranty, I’ll still try to help you get a replacement at cost or such. But I do use quality parts to minimize such occurrences.
- Warranty Documentation: On your invoice or contract, I usually include a line like “All work guaranteed for one year. Devices installed are covered under manufacturer’s warranty; defective units will be replaced at no charge within first year.” That way it’s documented. If a particular product has an extended warranty, I’ll provide that info or paperwork to you (for example, surge protectors often have connected equipment guarantees and such; I’ll register it if needed or give you the details).
- Service Calls under Warranty: If you call me during the warranty period with a problem, it will be prioritized. I’ll want to get out quickly to rectify it, both because I warranty it and for good customer service. And you won’t be charged a trip fee or anything – it’s treated as part of the original job.
- Beyond Warranty: Even after formal warranty expiration, as my client, you can call me with any concerns. I’m not going to split hairs if it’s slightly out of warranty but clearly related to our work. Moreover, many issues that might come up are not necessarily workmanship – could be something like a power surge damaging a part (beyond our control). But I’ll still often help diagnose and fix at minimal cost because I value the relationship, not just the letter of the warranty.
- What’s Not Covered: I should note, the warranty covers normal usage. If someone tampered with the work, or there was an unrelated electrical event (like a lightning strike) that caused damage, that wouldn’t be a workmanship issue. But again, I’d help where I could maybe through homeowner’s insurance or repairs. Basically, if it’s our fault or product fault, it’s covered. If it’s external, we’ll find a fair solution but technically that’s outside warranty.
I also guarantee that any code-required aspects will pass inspection (as covered earlier) – that’s part of standing behind the work. Warranties on electrical are essential because you should feel confident that after spending money on an upgrade or repair, you won’t have to spend again to fix the fixer, so to speak.
Many reputable contractors do the 1-year labor warranty as standard. I align with that practice. Some specific things might have longer guarantees: for instance, I’ve installed whole-house surge protectors that come with a manufacturer’s warranty on connected equipment; I’ll give you that documentation. Or standby generators often have 3-5 year manufacturer warranties – I’ll facilitate any claims if something happened in that window.
In summary, I do offer a warranty on my work and the materials I provide – generally a full year on labor and a manufacturer-backed warranty on parts. I want you to have peace of mind that if anything isn’t right, you won’t pay twice. And I’ll put that in writing on our agreement so you have it for your records.
Q31. What happens if an issue arises after the work is completed?
If any issue arises after I’ve completed the work, the approach is straightforward: you let me know, and I make it right. Here’s how I handle post-completion issues:
- Responsive Follow-Up: First of all, I encourage you to contact me if you notice any problems or have any concerns. I’m very reachable via phone, text, or email, and I prioritize any post-job callbacks. For example, if a circuit I worked on is intermittently tripping a breaker afterwards (which shouldn’t happen, but hypothetically), I will arrange a time to come out very soon – usually the same week, often the next day or two, depending on urgency – to troubleshoot and resolve it. I don’t consider a job fully done until you’re satisfied and everything is functioning correctly, so I take such calls seriously.
- Warranty Service: As discussed, if it’s within the warranty period and it’s an issue with my work or parts, there’s no charge for me to come fix it. Even if it’s outside the warranty but clearly related, I’m likely to handle it as a courtesy or at minimal cost. The bottom line is, I’m not going to leave you hanging with an electrical problem that was related to what I did. My reputation thrives on happy customers and long-term trust.
- Diagnostics and Solutions: When I come to address an issue, I will diagnose it at its root. Sometimes what a homeowner sees as an issue might have a different cause. Example: maybe after my work, an outlet in another room stopped working. It could be coincidental (like a lamp cord tripped the breaker or another device failed), or it could be something indirectly related (perhaps when I added a circuit, a connection feeding that outlet got jostled). Regardless, I’ll methodically figure it out. If it turns out to be something I did, I fix it, explain it, and make sure everything else is double-checked too (to prevent any further issues). If it was unrelated, I’ll let you know what it was and can fix that too while I’m there (possibly at a discounted rate since I’m around – I try to be fair).
- Customer Satisfaction: My goal is 100% customer satisfaction. So even beyond technical fixes, if something about the job isn’t to your liking, tell me. For instance, if you realize after we’re done that you’d prefer a different placement of a light or you’re unhappy with how something looks (maybe a wall patch isn’t perfect), I want to address that. Some things (like aesthetic preferences) aren’t “warranty” per se, but if it’s feasible to adjust, I often will. I’d rather you be thrilled with the result. Now, if it’s a big change from original plan, we’d discuss any cost, but minor tweaks I usually just do.
- Long-Term Relationship: Think of me as your electrician for life. Many of my clients call me years later for new work or even unrelated issues because they trust me. So I’m not disappearing after the check clears – I’ll be around, and I’m invested in solving any issues that come up.
- Communication: In the rare event something went wrong (say we missed hooking up a neutral and a circuit isn’t working), I’ll apologize for the inconvenience and fix it promptly. I believe in transparency – I’d explain what happened (“Looks like this wire wasn’t fully secured, causing a loose connection, which is why that outlet wasn’t working consistently. I’ve corrected it and tested the whole circuit to ensure it’s solid now.”). People appreciate honesty and a quick remedy more than excuses.
It’s worth noting that callbacks are pretty rare for me because of the care I put in initially, but I’m human and occasionally things happen (or parts fail). When they do, I handle them graciously. For example, I recall installing a batch of GFCI outlets once and one turned out defective (it randomly tripped with no load). The homeowner called, I swung by the next day and swapped it out in 10 minutes, no charge, and thanked them for alerting me. That kind of service is just standard practice for me, and clients often comment on how easy it was to get a hold of me and get the fix.
To sum up: If any issue arises after completion, I will return to investigate and resolve it promptly and at no additional cost if it’s related to my work. My commitment doesn’t end when I pack up my tools – I’m here to ensure everything continues to work safely and properly long after the project.
Q32. What safety measures do you take while working in my home?
Safety is paramount in my work – both for your home and family and for myself. I follow strict safety protocols and best practices throughout the job to ensure no accidents or damage occur. Here are some of the safety measures I take:
- Power Shutoff and Lockout/Tagout: When working on any electrical circuit or panel in your home, I will turn off the appropriate breakers (or main power if needed) to ensure the circuit is de-energized. I double-check with a voltage tester every time before touching wires. If I’m working in a panel or an environment where someone else might re-energize (less of an issue in a single home, but I still practice it), I’ll use a lockout/tagout device on the breaker – essentially a clip and tag that says “Do Not Turn On – Electrician at work”. This prevents any accidental energizing of circuits I’m working on.
- Personal Protective Equipment (PPE): I wear appropriate safety gear. This includes insulated gloves when working in panels or on live components (in rare cases I need to work live, like diagnosing a hot circuit – but I try to avoid live work unless absolutely necessary). I also use safety glasses when drilling, cutting, or hammering, to protect my eyes from debris. If I’m in an attic or crawlspace, I often wear a dust mask or respirator (especially around insulation) and sometimes a Tyvek suit to keep insulation off. And of course, sturdy work boots for foot protection. If I’m doing something like cutting concrete or similar (not common for electrical unless putting a ground rod or trench), I’d use hearing protection and so on. Essentially, I gear up correctly for each task.
- Household Safety and Cleanliness: I take measures to protect your home’s interior. I’ll use drop cloths or plastic sheeting under work areas to catch dust or debris. I often wear shoe covers or remove shoes when walking in (especially if not much needs hauling in) to avoid tracking dirt. If I need to use a ladder indoors, I have rubber pads on the feet to avoid scratching the floor, and I’m mindful of my surroundings (like not knocking into walls or fixtures). I also keep my tools organized in one area to avoid leaving sharp tools lying around. If you have kids or pets, I’ll discuss keeping them safely away from the work area (for their safety, and so they don’t snag a tool or live wire). In fact, I always double-check that at the end of the day or job, no tools, materials, or hazards are left where a child or pet could get to them.
- Following OSHA and Industry Safety Practices: I adhere to OSHA guidelines for construction safety. For instance, if I’m doing any overhead work or there’s a risk of falling objects, I’ll wear a hard hat. If on a tall ladder or roof (rare in residential electrical but sometimes for running a cable), I use proper ladder safety (4:1 ratio, tied off if possible, etc.). I carry a first-aid kit in my van just in case of minor injuries, and a fire extinguisher rated for electrical fires – thankfully, never needed, but always there.
- Electrical Safety Testing: After finishing work, I test everything (as noted earlier) – part of safety is ensuring all connections are tight (loose ones can heat up), all circuits are correctly wired (to avoid shock hazards), and that all fixtures are properly grounded. For example, I’ll use a receptacle tester on new outlets to confirm the ground is good and polarity is correct. I use an AC sensor to scan areas before drilling, to avoid hitting hidden live wires or pipes.
- Work Area Safety: I try to minimize shutting down too much power (so you have lights/fridge etc. still on), but if I do need to kill power to an area, I’ll let you know and ensure you have what you need (maybe providing a temporary light). I often put up warning tape or signs when there’s an open panel or floorboard, etc., to alert anyone at home to be cautious.
- Protecting Appliances and Electronics: When working on the panel or circuits, I take care to avoid sensitive electronics. If I suddenly cut power to a running computer or such, it could cause issues, so I usually advise homeowners to shut down computers, or I coordinate the outage to not damage anything. Similarly, I often check that after work, things like the HVAC, security system, etc., reboot and function properly (because if not, maybe a breaker was left off or a fuse blew; I address it).
These safety measures stem from training and experience. I also make sure any crew or helper with me follows them too. Safety is a culture in my business – we don’t take shortcuts that compromise safety, ever.
A quick anecdote: a homeowner once remarked how I was the only contractor who asked about their pets’ whereabouts while working – I explained I was concerned a cat might hide in the attic or get curious about wiring, so we made sure the cat was in a closed room. They appreciated that level of thoughtfulness. To me, that’s part of jobsite safety too: accounting for the environment, including beloved pets!
In summary, I take comprehensive safety measures: cutting power when needed, using PPE, securing the work area, and following proper procedures to protect everyone and everything in your home during the project. Safety is non-negotiable for me – I treat your home with the same caution as if it were my own and my family was there.
Q33. Do you follow industry best practices for protecting my property and family?
Yes, I certainly do. In addition to the strict electrical safety protocols we discussed, I also follow many other best practices to protect your property and family during the project. This is a holistic commitment – from keeping the work neat to maintaining a secure environment. Here’s how:
- Respectful of Your Home: I treat your home as I would want someone to treat mine. This means I’m careful moving ladders or materials around corners and through doorways to avoid scuffs. I don’t place tools on furniture. If I need to access attic hatches or panels in closets, I’ll ask you to remove or I will carefully move clothing or stored items out of harm’s way and put them back. Essentially, I try to leave no trace except the improved electrical work.
- Dust Control and Cleanup: Electrical work can involve cutting small holes or drilling, which can create dust or debris. I use vacuum attachments when drilling whenever possible, and I will isolate work areas with plastic sheets if it’s a dusty task (like cutting into drywall). Once the job is done, I always clean up. I carry a small vacuum and broom; I’ll vacuum up drywall dust, pick up wire clippings, etc. You shouldn’t have to clean after I leave – it will be as clean or cleaner than when I came. That’s an important best practice in my book; it also ties into safety – no stray bits for kids/pets to choke on, no conductive scraps left near live parts, etc.
- Security and Privacy: I’m mindful that I’m in someone’s personal space. I only access areas relevant to the work. If I need to go to a bedroom or office to work on an outlet, I’ll ask if it’s a good time (not, say, when a baby is napping). I respect closed doors and the family’s routines. Also, I make sure that while I’m working, your home is secure – for instance, if I run an extension cord out the door, I won’t just leave the door wide open for long periods (inviting pests or risking someone’s pet escaping). I coordinate with you about things like that. If I’m on a break or at lunch, I’ll lock up or inform you, so your home isn’t unattended and open.
- Family Safety During Work: If you have curious children, I’m very friendly explaining in simple terms what I’m doing, but I also caution them not to come too close to the work area for their safety (sharp tools, open wires). Sometimes kids want to “help” – I’ll usually give them a very safe task like “You can hand me this screwdriver when I ask” just to satisfy their curiosity, but keep them well away from danger. Same with pets – I might ask if the dog can be kept in a separate room/garden while I’m running in and out with materials, to prevent any accidents or escapes.
- Quality and Best Practice Installation: Protecting your property also means doing things that perhaps aren’t required but are wise. For example, if I install a new outlet in an exterior wall, I’ll use foam sealant around it to prevent drafts/pests (good practice). If I run cables in an accessible area, I’ll route and staple them neatly out of the way to avoid someone snagging them in the future (so your property remains safe long term). I use grommets when feeding wires through metal studs to prevent future abrasion. These little best practices ensure your home’s integrity and safety are maintained.
- Licensed and Insured: As we discussed, being licensed and insured is itself a protection for your property and family. It means I have the training to do things correctly and insurance in the unlikely event something goes wrong. This is an underlying best practice I adhere to – always operate legally and responsibly.
- Adapting to Your Family’s Needs: Every household is different. Some have individuals with allergies – so I use low-dust practices and perhaps HEPA vacuum. Some have elderly family members – I coordinate to not cut power to crucial medical devices or to work around their schedule. In one case, a client had a home office running a business – I scheduled the power interruptions after hours to not disrupt them. These aren’t codes or rules, but they are best practices that protect the family’s well-being during the project.
- Professional Conduct: Best practices for me also extend to conduct – no loud music, no smoking on premises, polite language. It fosters a respectful environment which I think indirectly protects your family’s comfort and peace of mind. I want you to feel safe having me around.
To directly answer: Yes, I follow industry best practices and go above-and-beyond to protect your property and family during my work. From using PPE and safe procedures to keeping a tidy, secure work area, I take comprehensive measures. The Electricians’ code of conduct might not be a formal thing, but I abide by a personal code: leave the home better than I found it, both electrically and in terms of cleanliness and safety. This is part of the professionalism that you should expect and that I’m proud to deliver.
Closing Summary
Protecting your home’s electrical system and your family’s safety is my top priority. In this guide, I’ve addressed the most common questions homeowners in the Tulsa area ask me as a Master Electrician. We started by troubleshooting everyday issues like dead outlets, tripping breakers, flickering lights, and sparking plugs – and we learned these often have straightforward causes that a professional can fix, restoring your home’s power reliability and safety. We discussed the importance of modern safety devices: installing GFCI outlets wherever water and electricity meet, adding AFCI breakers to prevent hidden wiring fires, testing these devices regularly, and using surge protectors to shield your valuable electronics from voltage spikes.
For those with older homes, we highlighted how to recognize outdated or hazardous wiring (like knob-and-tube or aluminum) and the benefits of upgrading your electrical panel to handle today’s appliance loads – it’s an investment in safety, capacity, and peace of mind. When it comes to hiring an electrician, I emphasized the value of choosing a licensed, insured professional with plenty of residential experience (yes, I have over 20 years myself). A good electrician will communicate clearly, provide written estimates that include everything, and stand behind their work with warranties.
I also detailed how I personally approach each job: with proper permits, strict code compliance, and utmost respect for your home. That means using safe work practices (de-energizing circuits, wearing protective gear) and keeping the work area clean and secure to protect your family and property. My goal is not only to solve your electrical issues or complete your project to code, but to leave you completely satisfied – confident that the wiring in your walls is safe and sound, and pleased with the courteous, reliable service you received.
In short, whether you need a breaker fixed, a fan installed, an entire house rewired, or just some expert advice, you can count on TL Davis Electric & Design to deliver quality, safety, and professionalism every step of the way. It’s been my pleasure to share this information with you, and I hope it empowers you to make informed decisions about your home’s electrical needs. Remember, electricity is the lifeblood of your home – treat it with respect and enlist qualified help when needed. If you have any more questions or if I can be of service, please don’t hesitate to reach out. Thank you for reading, and stay safe!
References (APA format)
Gaddie Electric. (2024, November 25). 9 Essential Questions to Ask When Hiring an Electrical Contractor. Gaddie Electric Blog. Retrieved from gaddieelectric.com/residential/questions-to-ask/
Houchin Electric Company. (2026). Frequently Asked Questions – Houchin Electric FAQ. Retrieved from houchinelectric.com/faq
Knee’s Electrical Service. (n.d.). 6 Signs You’re In Need of a Professional Electrical Repair. Knee’s Electric Blog. Retrieved from kneeselectric.com
Right Touch Electrical. (2023). Where Are Arc Fault Circuit Breakers Required? Right Touch Educational Blog. Retrieved from righttouchelectrical.com
Safe Electricity. (n.d.). Avoid Electrical Fires At Home – Safety Tips. SafeElectricity.org. Retrieved from safeelectricity.org
Stack Heating, Cooling, Plumbing & Electric. (2025). Electrical Servicing by Stack – Signs Your System Needs Servicing. Stack Heating Blog. Retrieved from stackheating.com
The Electricians Co. (2025). Top Questions to Ask an Electrician. The Electricians Blog. Retrieved from theelectriciansco.com
The Electricians Co. (2025). Breaker Keeps Tripping? Causes and When to Call an Electrician. The Electricians Blog. Retrieved from theelectriciansco.com
The Electricians Co. (2025). Why Outlets Spark – Common Causes. The Electricians Blog. Retrieved from theelectriciansco.com
The National Fire Protection Association (NFPA). (2020). NFPA 70 – National Electrical Code, 2020 Edition. Quincy, MA: NFPA.